Getting Started with WhatsApp
This guide provides the step-by-step process for activating your WhatsApp Business Platform account and connecting it to the 8x8 Connect portal. The "portal-first" approach uses 8x8's embedded signup flow, which is the fastest way to get started.
8x8 Account Structure & Interaction Methods
This is how 8x8 organizes your service and how you interact with it:
-
8x8 Account: Your main customer account.
-
Subaccount: Logical groupings within your Account (e.g., by department, use-case, target country, etc). API calls require a
subAccountId. -
Channel: Configured within a Subaccount, a Channel represents a specific communication service you've enabled (e.g., WhatsApp, SMS, Viber). For WhatsApp, this channel connects to your WhatsApp Business Phone Number to establish your sender identity.
Prerequisites & Checklist
Before you begin the setup process, ensure you have the following:
-
An 8x8 Connect Account: You must have an active 8x8 Connect account with the 8x8 Messaging Apps product enabled.
-
A Meta Business Portfolio: You will need a Meta Business Portfolio (formerly Business Manager) to own your WhatsApp Business Account (WABA). If you don't have one, the setup process will guide you in creating one.
-
A New Phone Number: You need a phone number that is not currently associated with any WhatsApp account (neither the consumer app nor another business account). This number will be dedicated to your business profile.
-
Access to the Phone Number: You must be able to receive a one-time passcode (OTP) via SMS or a voice call to the phone number you are registering.
-
Admin Access: You must have administrator-level access to both your 8x8 Connect account and your Meta Business Portfolio.
Connect Meta & 8x8 (Embedded Signup)
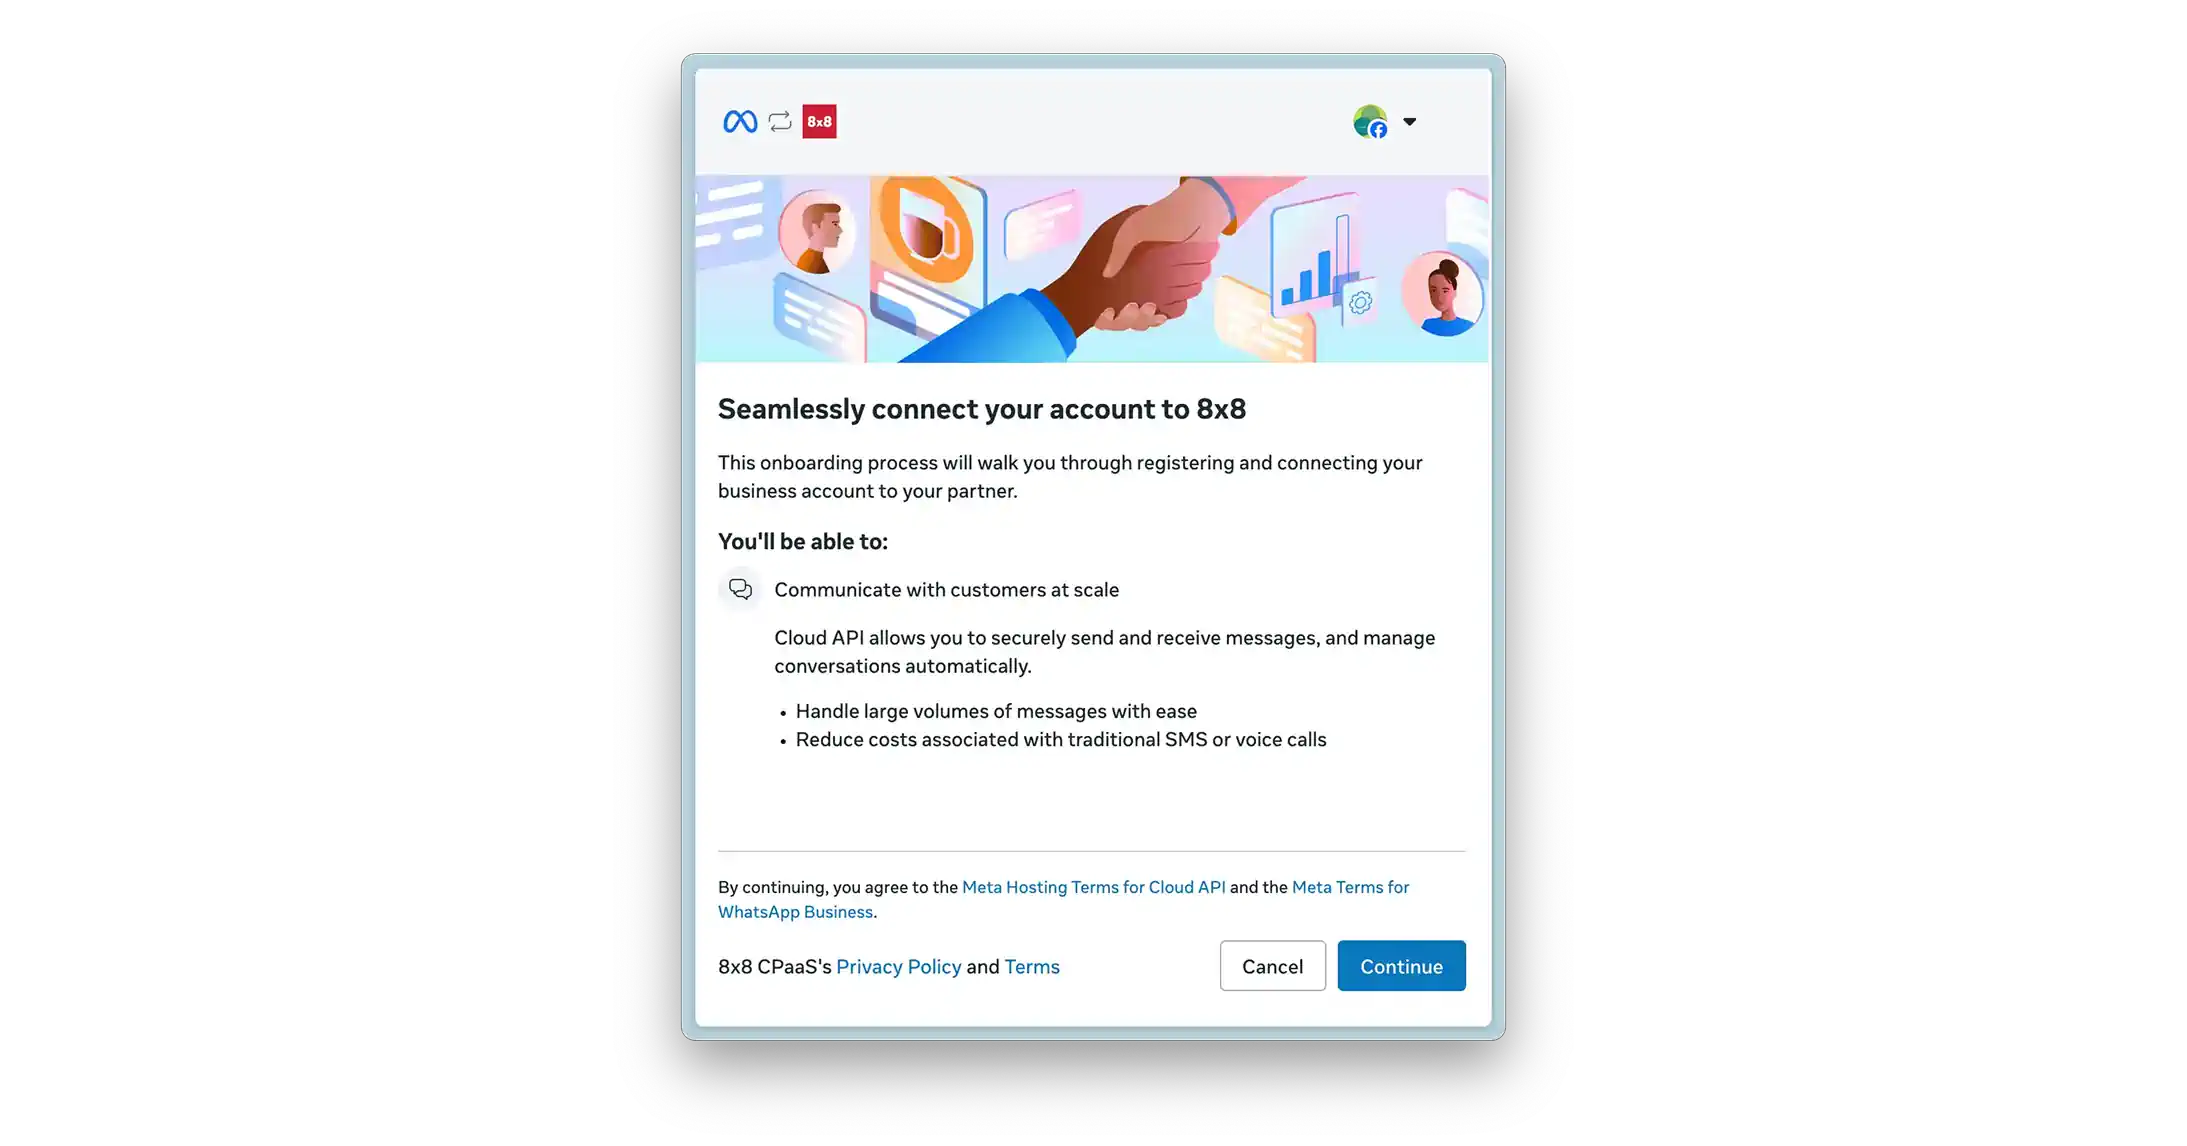
The 8x8 WhatsApp Business Platform utilizes Meta's Embedded Signup flow. This is a secure, Meta-hosted process launched from within the 8x8 Connect portal that allows a user to create and link all necessary Meta assets to their 8x8 account.
How it Works
The embedded signup process simplifies onboarding by guiding the user through all required steps in a single, linear flow, eliminating the need for manual configuration in the Meta Business Platform.
Onboarding Flow
-
Log in to 8x8 Connect: Authenticate into the 8x8 Connect portal.
-
Initiate Onboarding: Navigate to the channel provisioning section (e.g., "Messaging Apps" > "Channels") and select to add a WhatsApp channel.
-
Launch Embedded Signup: The system will launch a Meta-hosted wizard. A pop-up window managed by Meta will open.

-
Authenticate with Meta: Log in using Meta credentials for an account with administrative access to the desired Meta Business Account.
-
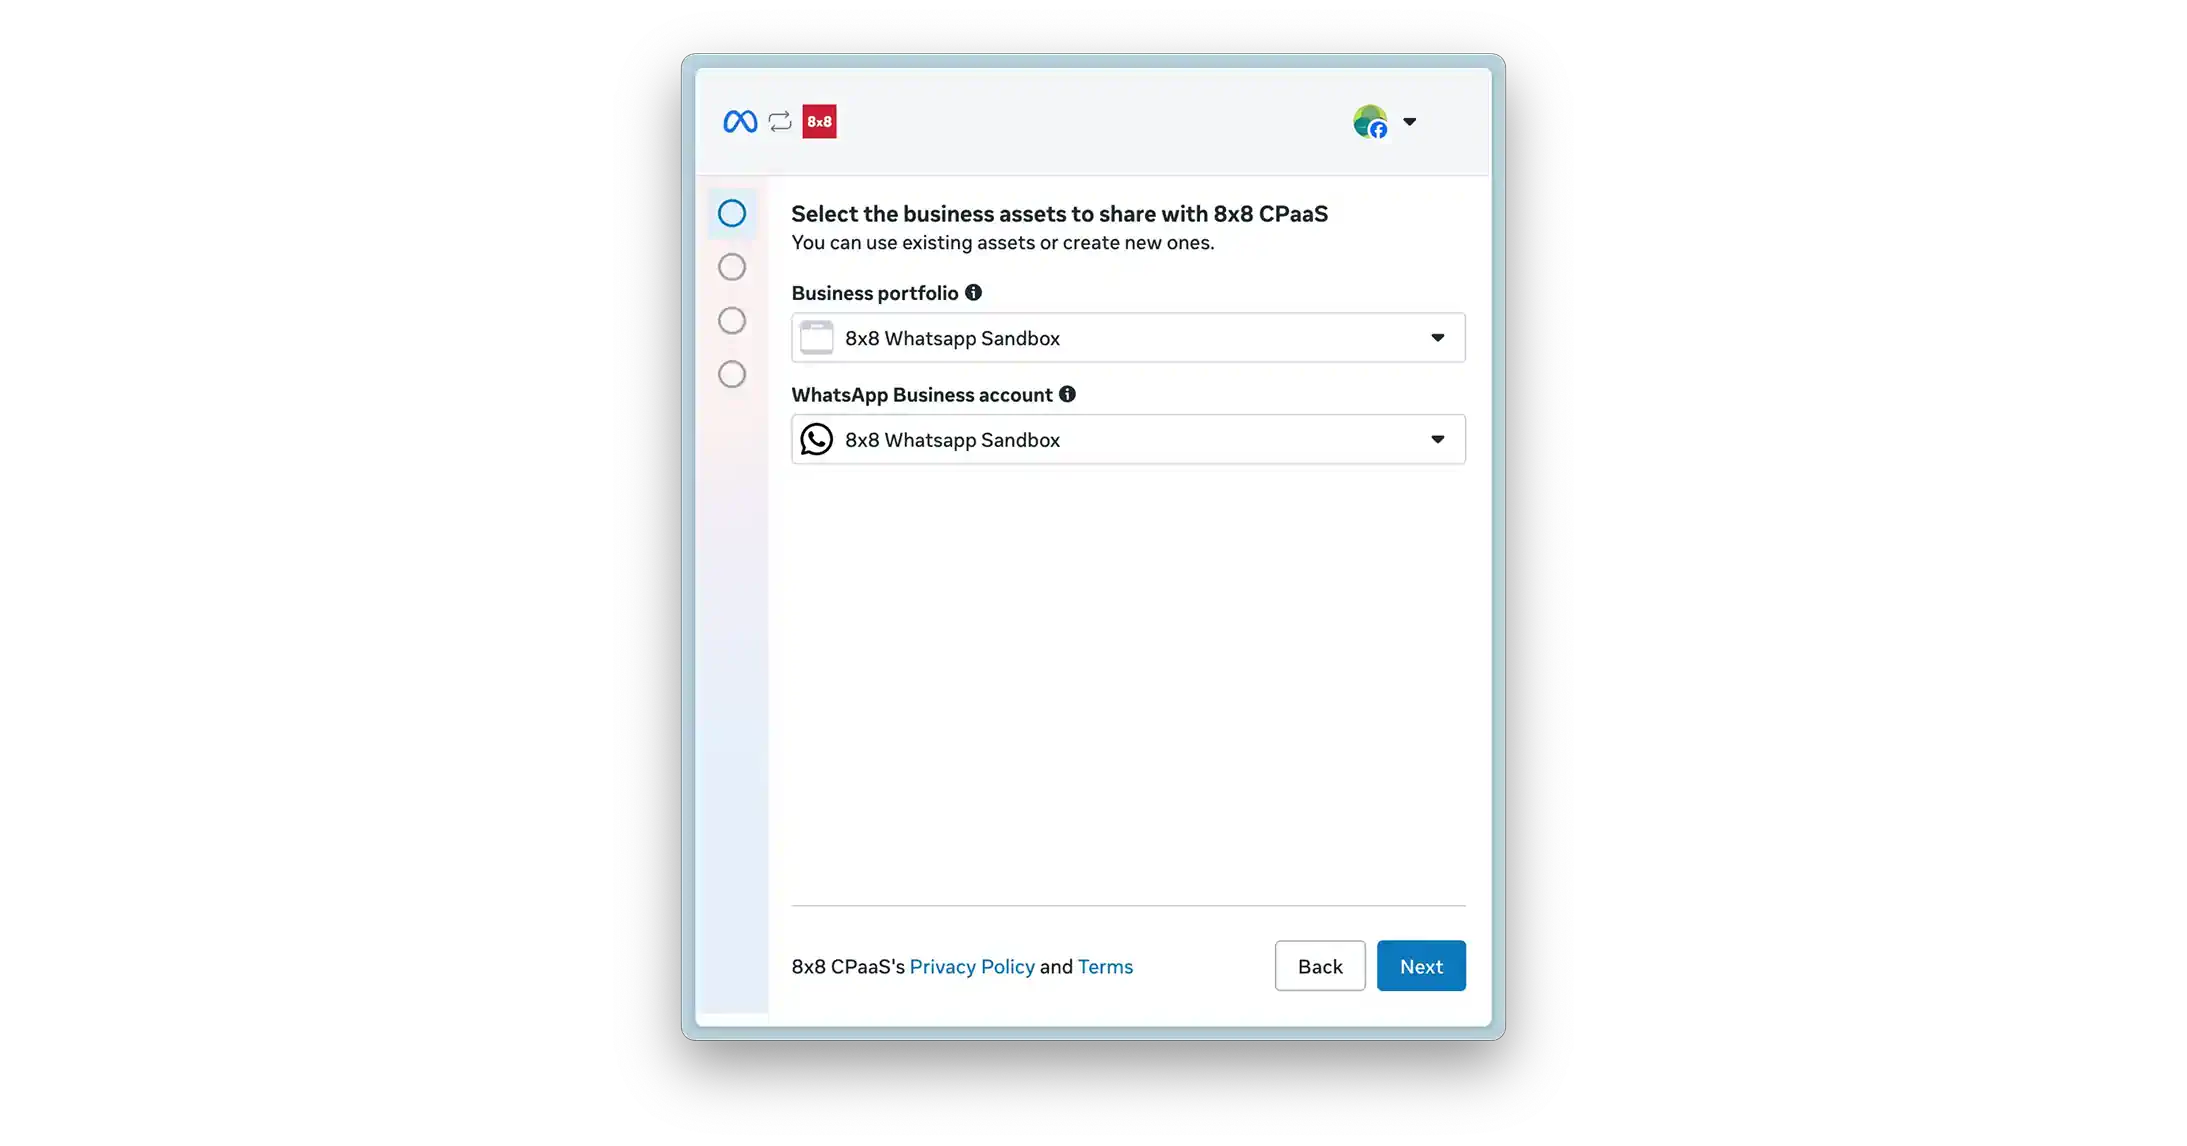
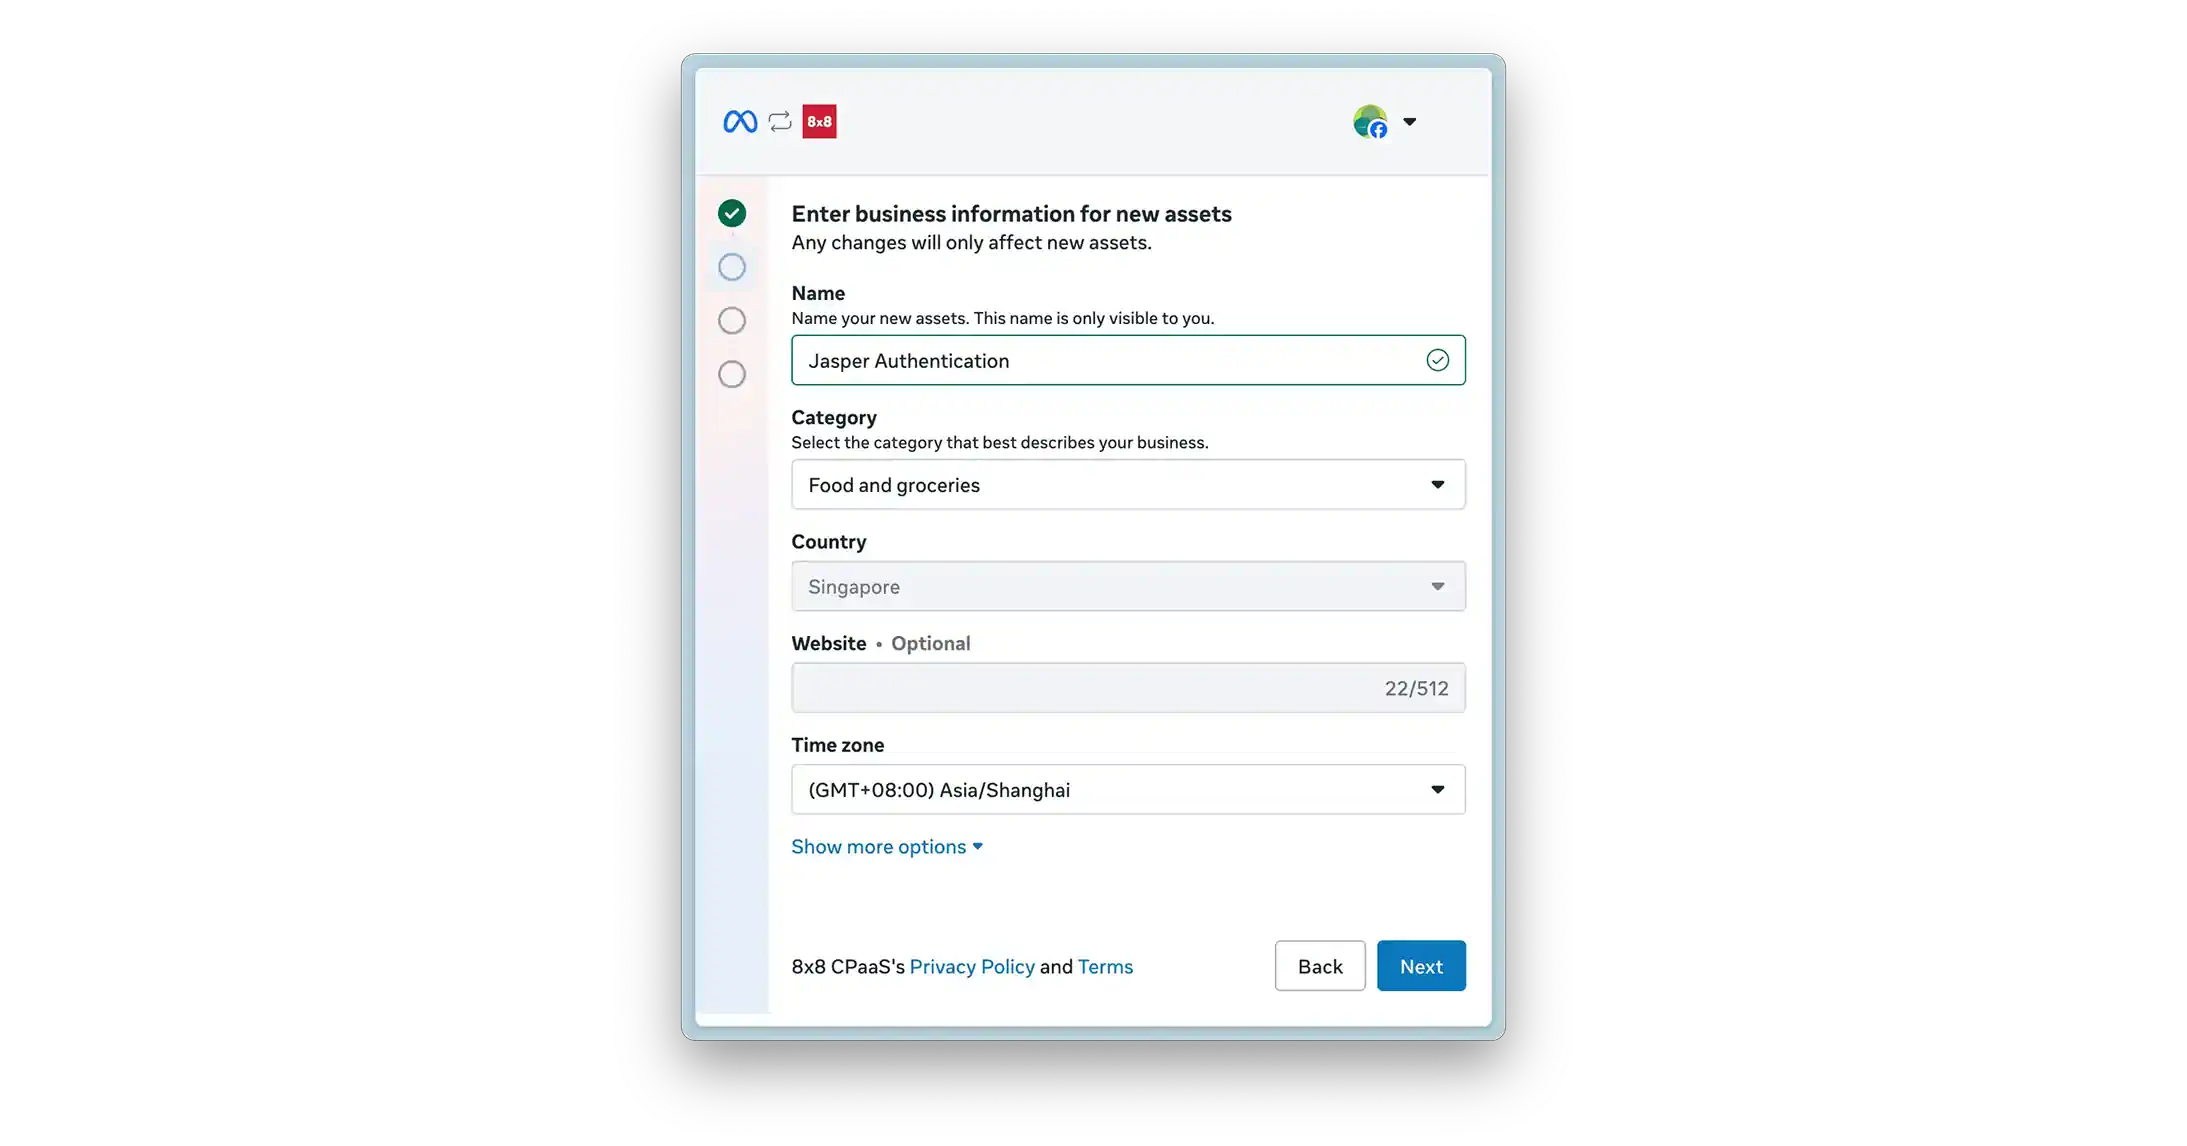
Select/Create Assets: The flow will provide options to:
-
Create a new Meta Business Account or select an existing one.
-
Create a new WhatsApp Business Account (WABA) or select an existing one.
-
Create a new WhatsApp Business Profile or select an existing one.
-
-
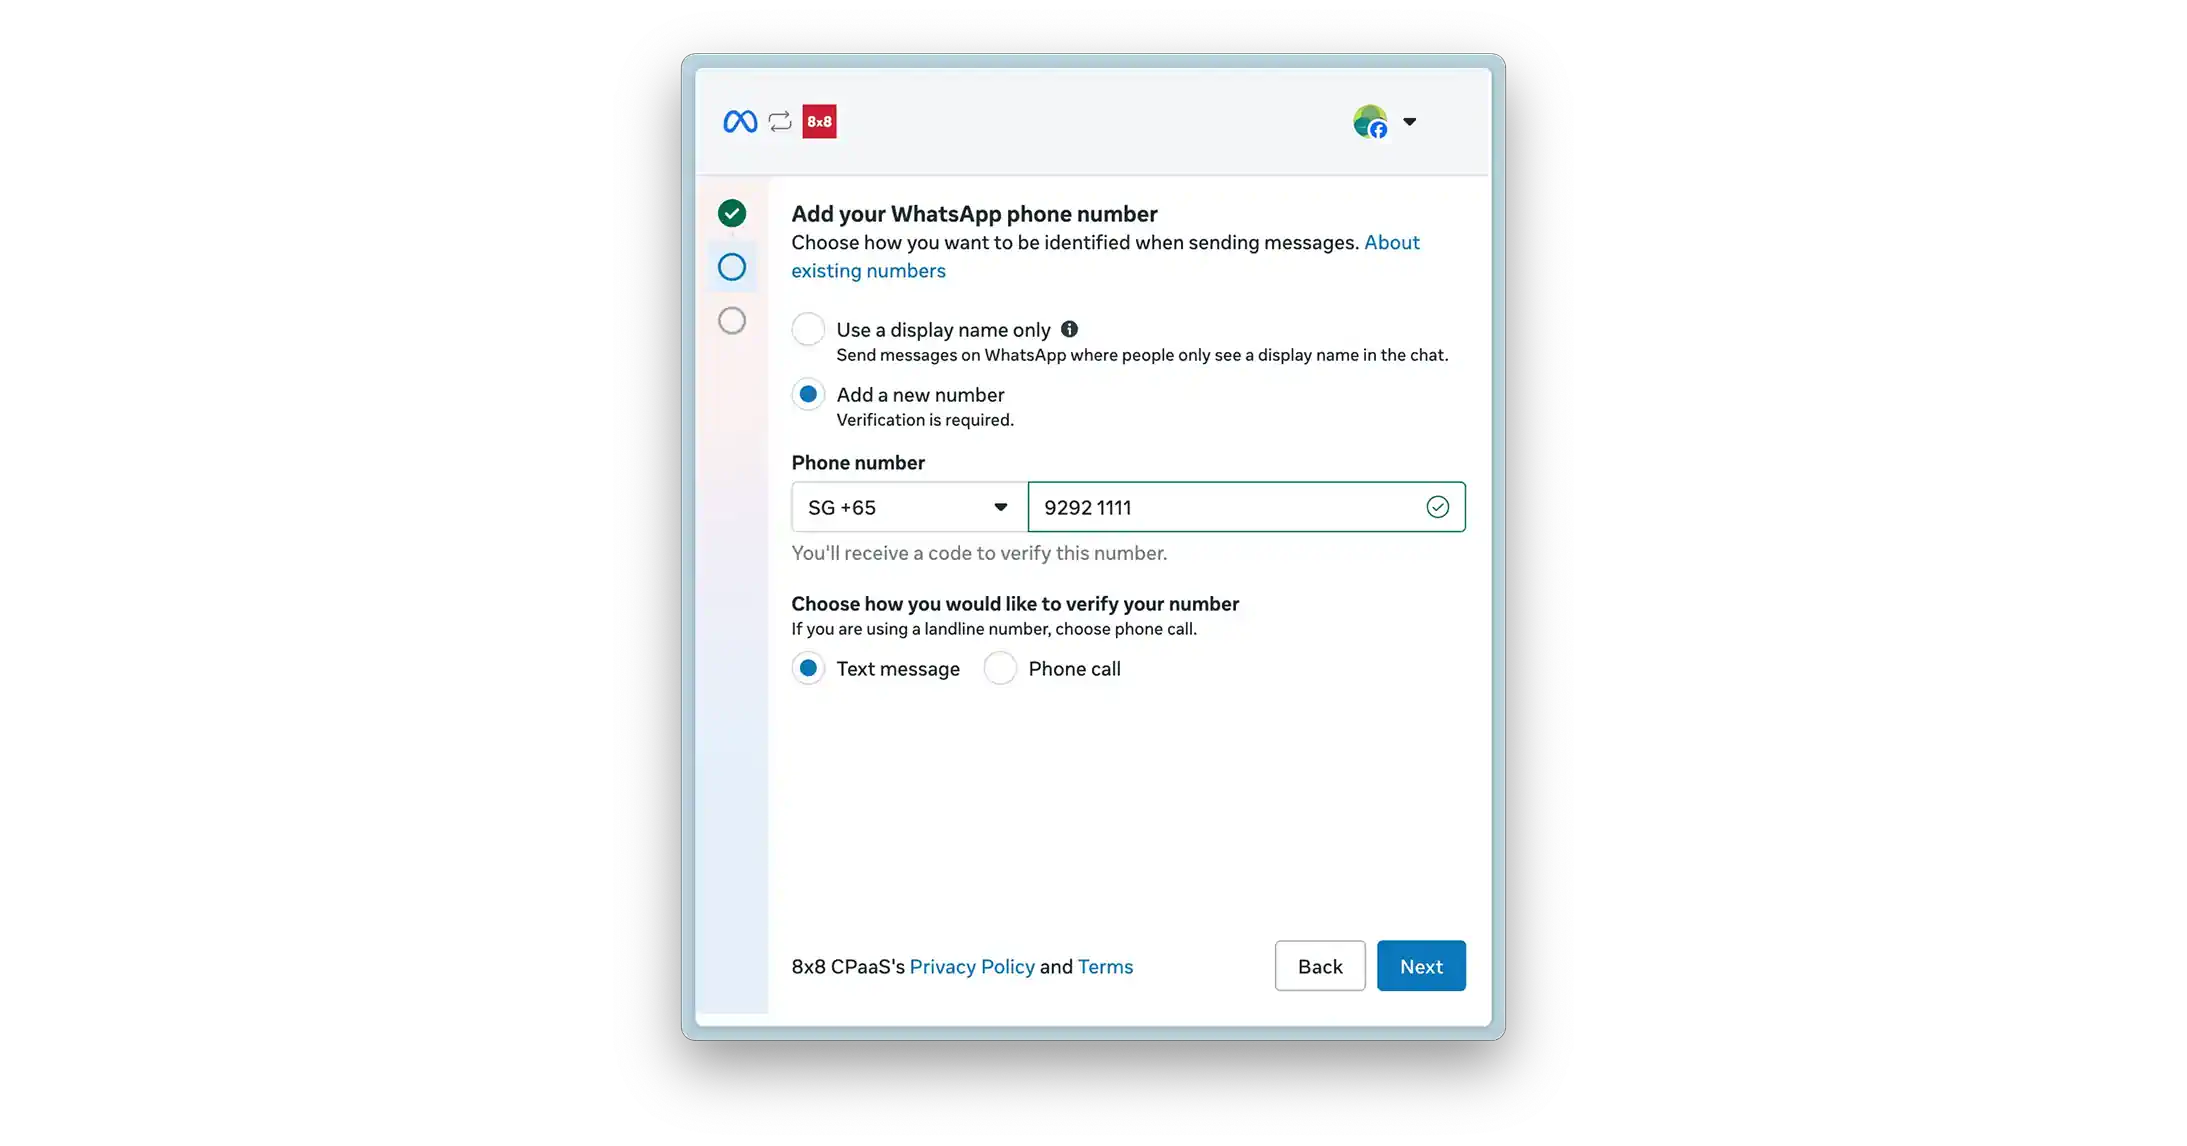
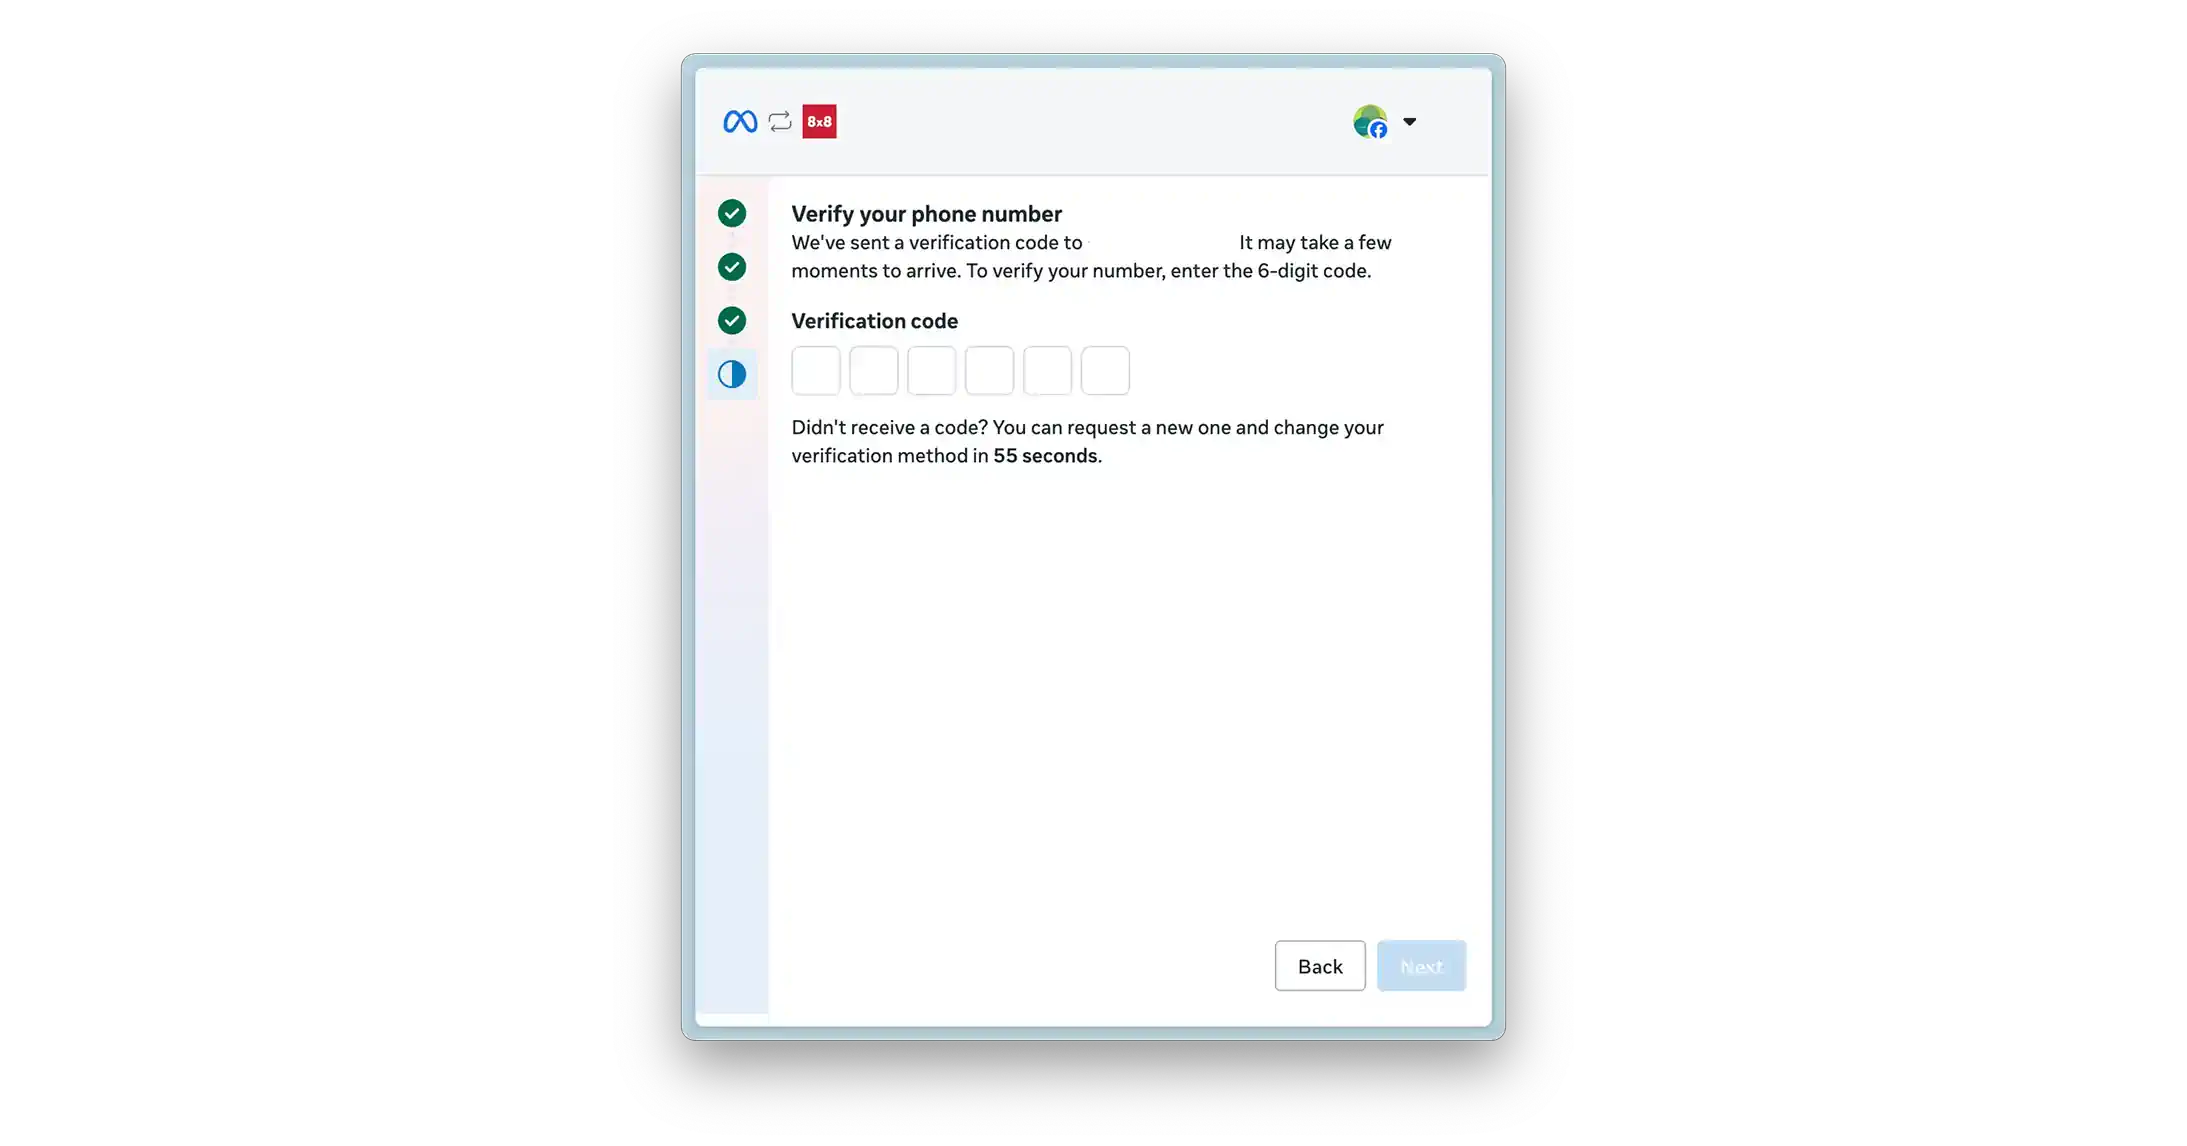
Add & Verify Phone Number:
- Provide the phone number to be associated with the WhatsApp channel.
- Select a verification method (SMS or Voice Call).
- Enter the 6-digit verification code received on that number.
-
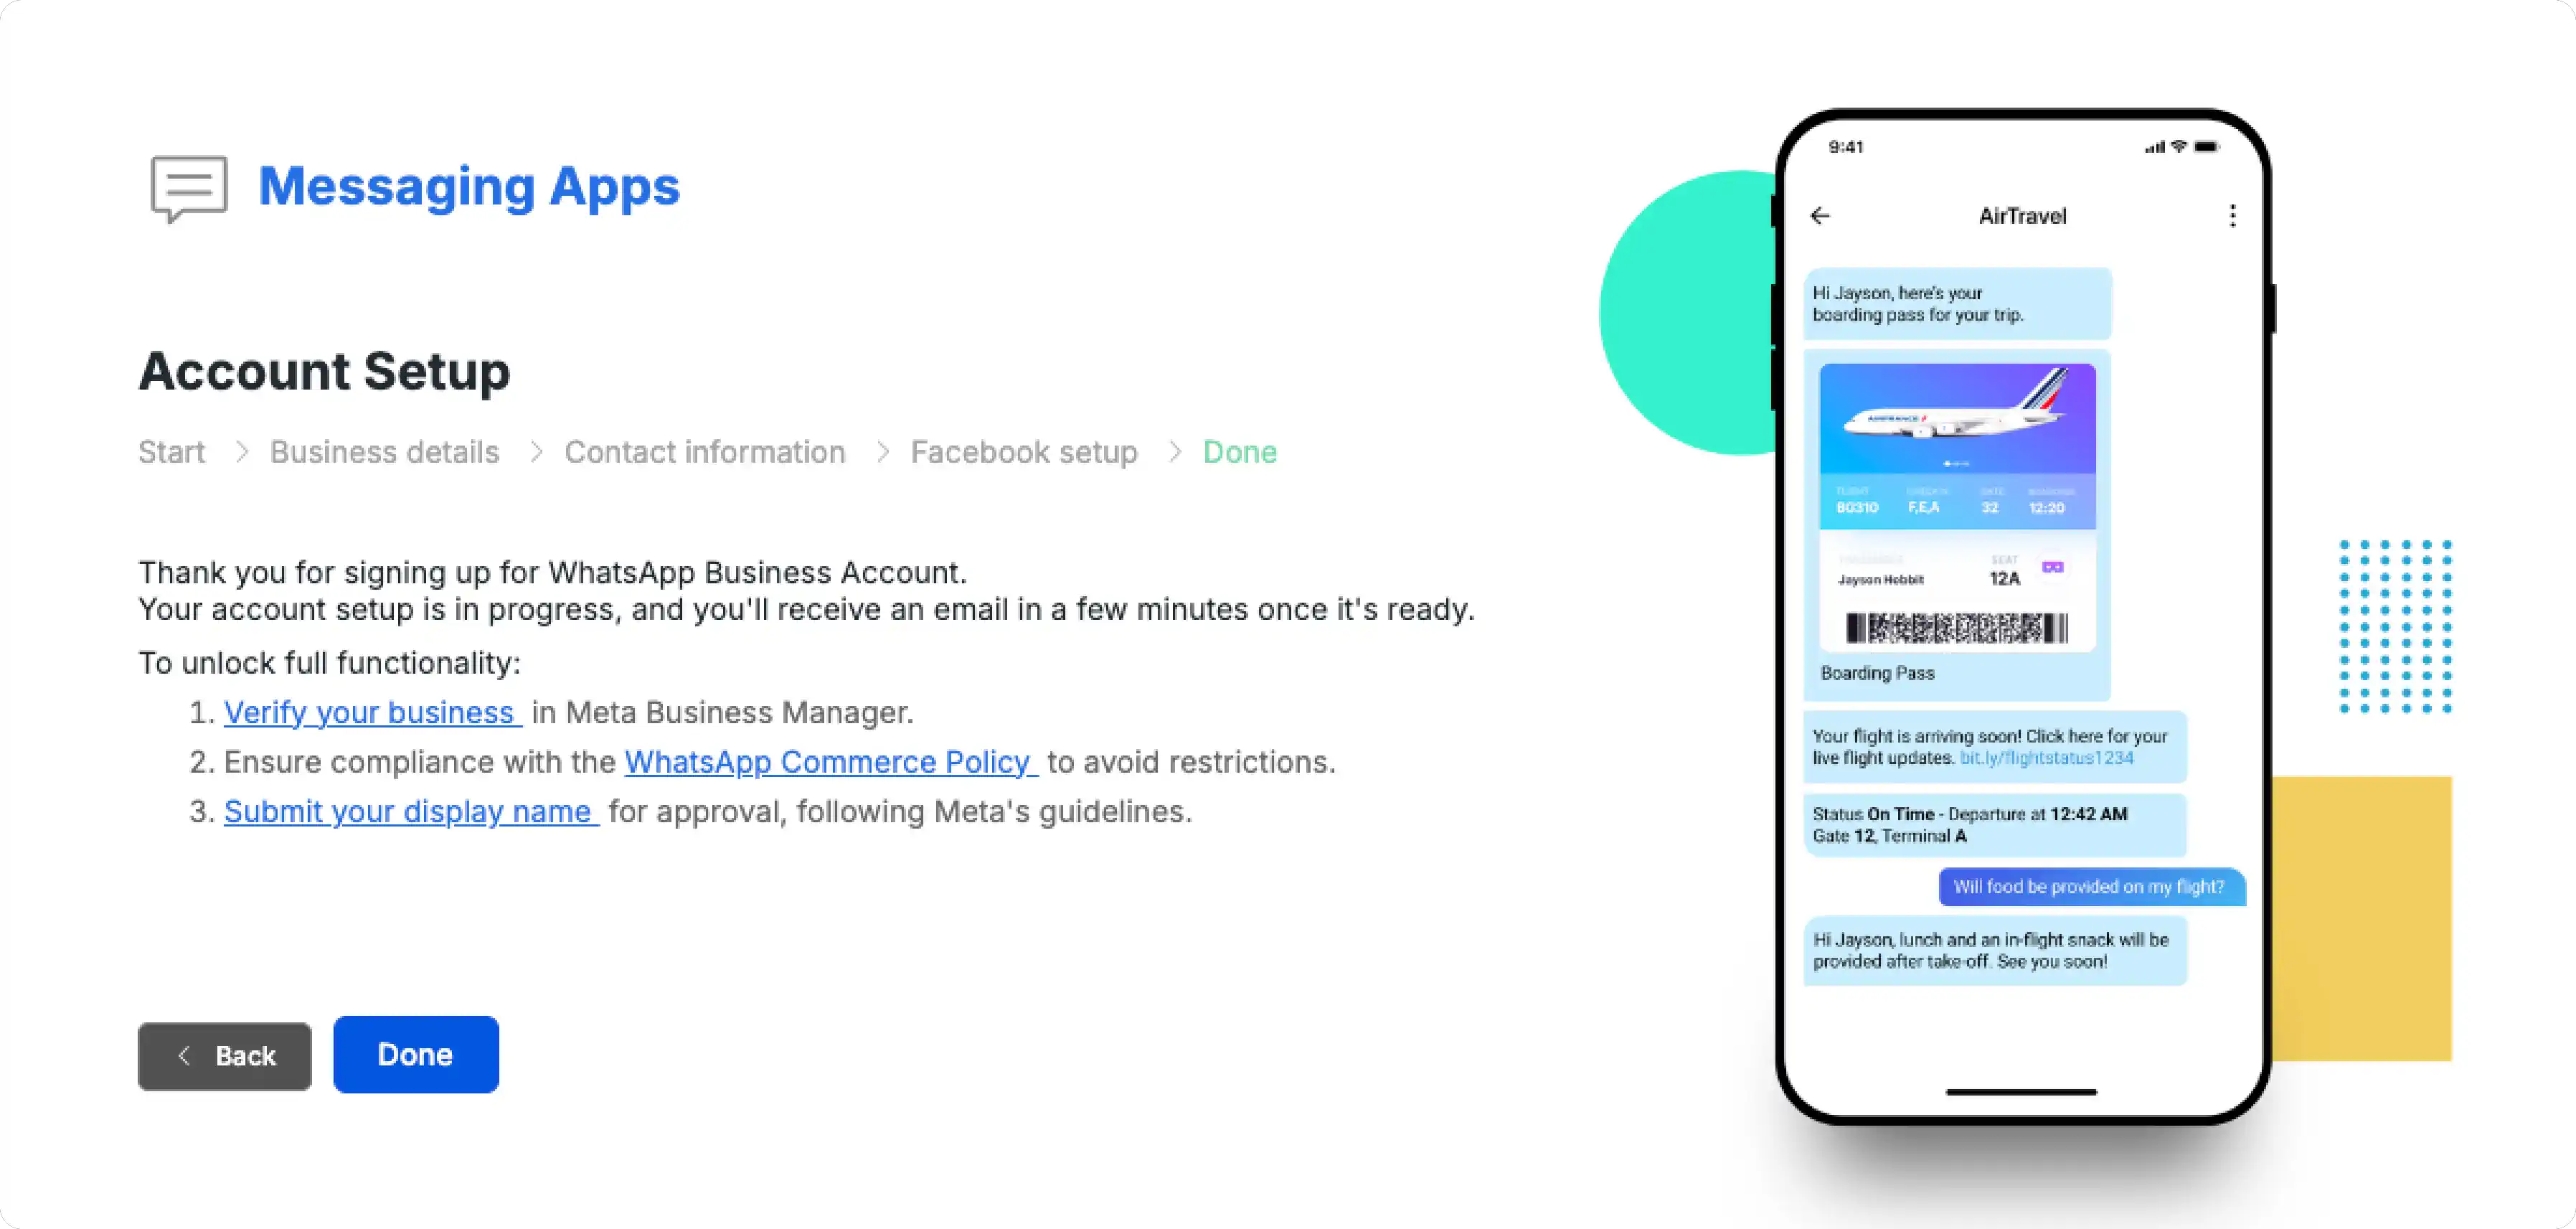
Complete Flow: Upon successful verification, the Meta-hosted window will close. The flow will return the user to the 8x8 Connect portal, and the necessary identifiers will be automatically provisioned for the new channel. This new, active channel is now visible in your 8x8 Connect portal, as described in the next step.
Business Verification & Raising Limits
Meta's business verification confirms your company's legitimacy and is required to access certain platform features. WhatsApp uses this same verification to scale your messaging limits and build trust.
For more information, see About business verification.
Why Verification is Required
-
Scale Messaging: Verification is the first step to move beyond the initial 250-user limit. Verified businesses can engage up to 2,000 unique customers per 24 hours and subsequently scale to 10,000, 100,000, or unlimited, based on sending volume and quality.
-
Build Trust: Your verified business display name becomes visible to customers in the WhatsApp client.
-
Add More Numbers: Verified businesses can register multiple phone numbers under their WABA; unverified businesses are limited.
-
Apply for OBA: Verification is a prerequisite before you can request an Official Business Account (green checkmark).
How the Verification Process Works
You must complete this process in your Meta Business Portfolio's Security Centre.
-
Start Verification: Go to the Security Centre in your Meta Business Portfolio and start the process.
-
Enter Business Details: Provide your business's legal name, address, phone number, and website. These details must exactly match your official legal documents.
-
Confirm Records or Upload Documents:
-
Meta will first try to find a match in its official records.
-
If no match is found, you will be asked to upload documents.
-
-
Confirm Your Connection: You must prove you are associated with the business via one of these methods:
-
Email
-
Phone Call
-
SMS
-
WhatsApp Message
-
Domain Verification (uploading an HTML file to your website)
-
-
Wait for Review: Meta's review can take up to 14 working days.
Required Documentation (If Requested)
You may be asked to provide proof of your legal entity and your address/phone number.
-
Accepted for Legal Entity: Business license, Certificate of Formation/Incorporation, Business Tax or VAT registration certificate.
-
Accepted for Address/Phone: Utility bill, Bank statement, or any of the legal entity documents listed above if they show your address/phone.
-
Not Accepted: Invoices, purchase orders, tax returns, website printouts, or marketing materials.
Providing false or misleading information can lead to denial. After verification, certain portfolio details (like legal name and country) become locked.
Confirm and Locate Your New Channel
After completing the Embedded Signup flow (step 3.2), your verified phone number is now an active 'Channel' in the 8x8 Connect portal. This channel is the 'sender' you will use for all portal-based activities and is the entity linked to your subAccountId for API calls.
-
In the 8x8 Connect portal, navigate to Messaging Apps > Channels.
-
You will see your newly connected WhatsApp phone number (e.g.,
+15551234567) listed. -
Select this channel to view its details. Note the Channel ID and the Subaccount it is associated with. You will need the Subaccount ID for API calls.
-
This channel is now available to be selected in the Campaigns tool, 8x8 Converse, and the Automation Builder.
Send Your First Message from the Portal
The easiest way to send your first message is by using the Campaigns tool (formerly Multi-Channel Sender, or MCS).
-
Navigate to Campaigns from the main portal menu.
-
Click "Create a new campaign" and select "Messaging Apps".
-
Select the Subaccount that contains your WhatsApp channel, and then choose your WhatsApp Channel (phone number) from the "From" dropdown.
-
Add a recipient's phone number in the "Add recipients" section (e.g., by typing the number).
-
In the "Compose a message" section, you must select an approved Message Template.
-
You cannot send a freeform text message to initiate a conversation.
-
Select a pre-approved template (e.g., a "Utility" template like
hello_world).
-
-
Click "Send your message(s)" to review and dispatch the message.
-
Test the 24-hour window: Once the recipient receives the message, have them reply. You can now use the Campaigns tool again to send them a freeform (non-template) text message, as the customer service window is now open.
Next Steps
Now that you've set up your WhatsApp channel and sent your first message, explore these resources to build on your foundation:
For Business Users:
- Message Types & Templates - Learn how to create and manage custom templates for your campaigns
- WhatsApp in 8x8 Connect - Discover how to use Campaigns, Converse, and Automation Builder
- Scenarios & Tutorials - Follow step-by-step guides for common use cases
For Developers:
- WhatsApp over 8x8 API - Start building with the API to automate messaging
- Template Message API Library - Explore template message examples with complete JSON payloads
- Interactive Message API Library - Learn how to send rich interactive messages
Important Concepts:
- Concepts & Fundamentals - Understand the 24-hour window, quality ratings, and messaging limits
- Governance, Security & Compliance - Review opt-in requirements and Meta's template policies