Developer Tools
8x8 Connect allows developers to manage their API Keys, Webhook endpoints, and IP Whitelisting easily through their respective pages.
API Keys
This page allows to see, create and manage any API keys associated to your account.
API keys are used to authenticate with all 8x8 APIs, more information can be found here.
Webhooks
This page allows you to see, create and manage your webhooks.
Webhooks are used for 8x8 to automatically send you information such as delivery receipt and incoming messages. You can find more informations on webhooks here .
The webhook list will show you information such as:
- Subaccount: The subaccount the webhook is attached to.
- Type: The type of webhook which relates to the API it is tied to (Chat Apps, SMS).
- URL: The URL the webhooks are being sent.
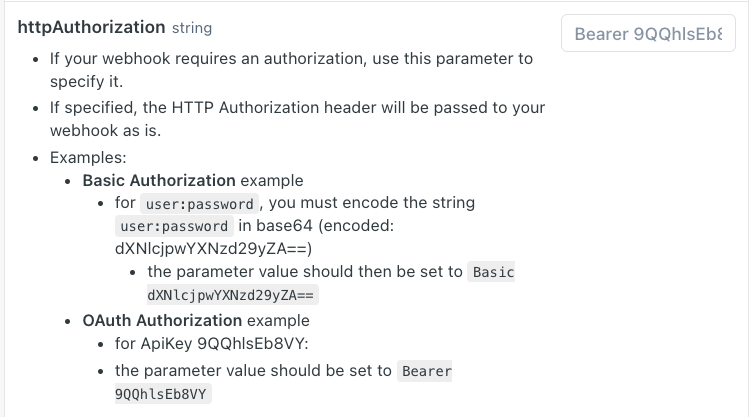
- HTTP Authorization: The HTTP Authorization (if any) that is being used. For now the HTTP Authorization is a string that is added to the header that your server can use to authenticate the webhook.
- You can find more information on the parameter here under the Body Params Object.
- Content Type (Deprecated): No longer used in newer webhooks.
- Status: Whether the webhook is enabled/disabled
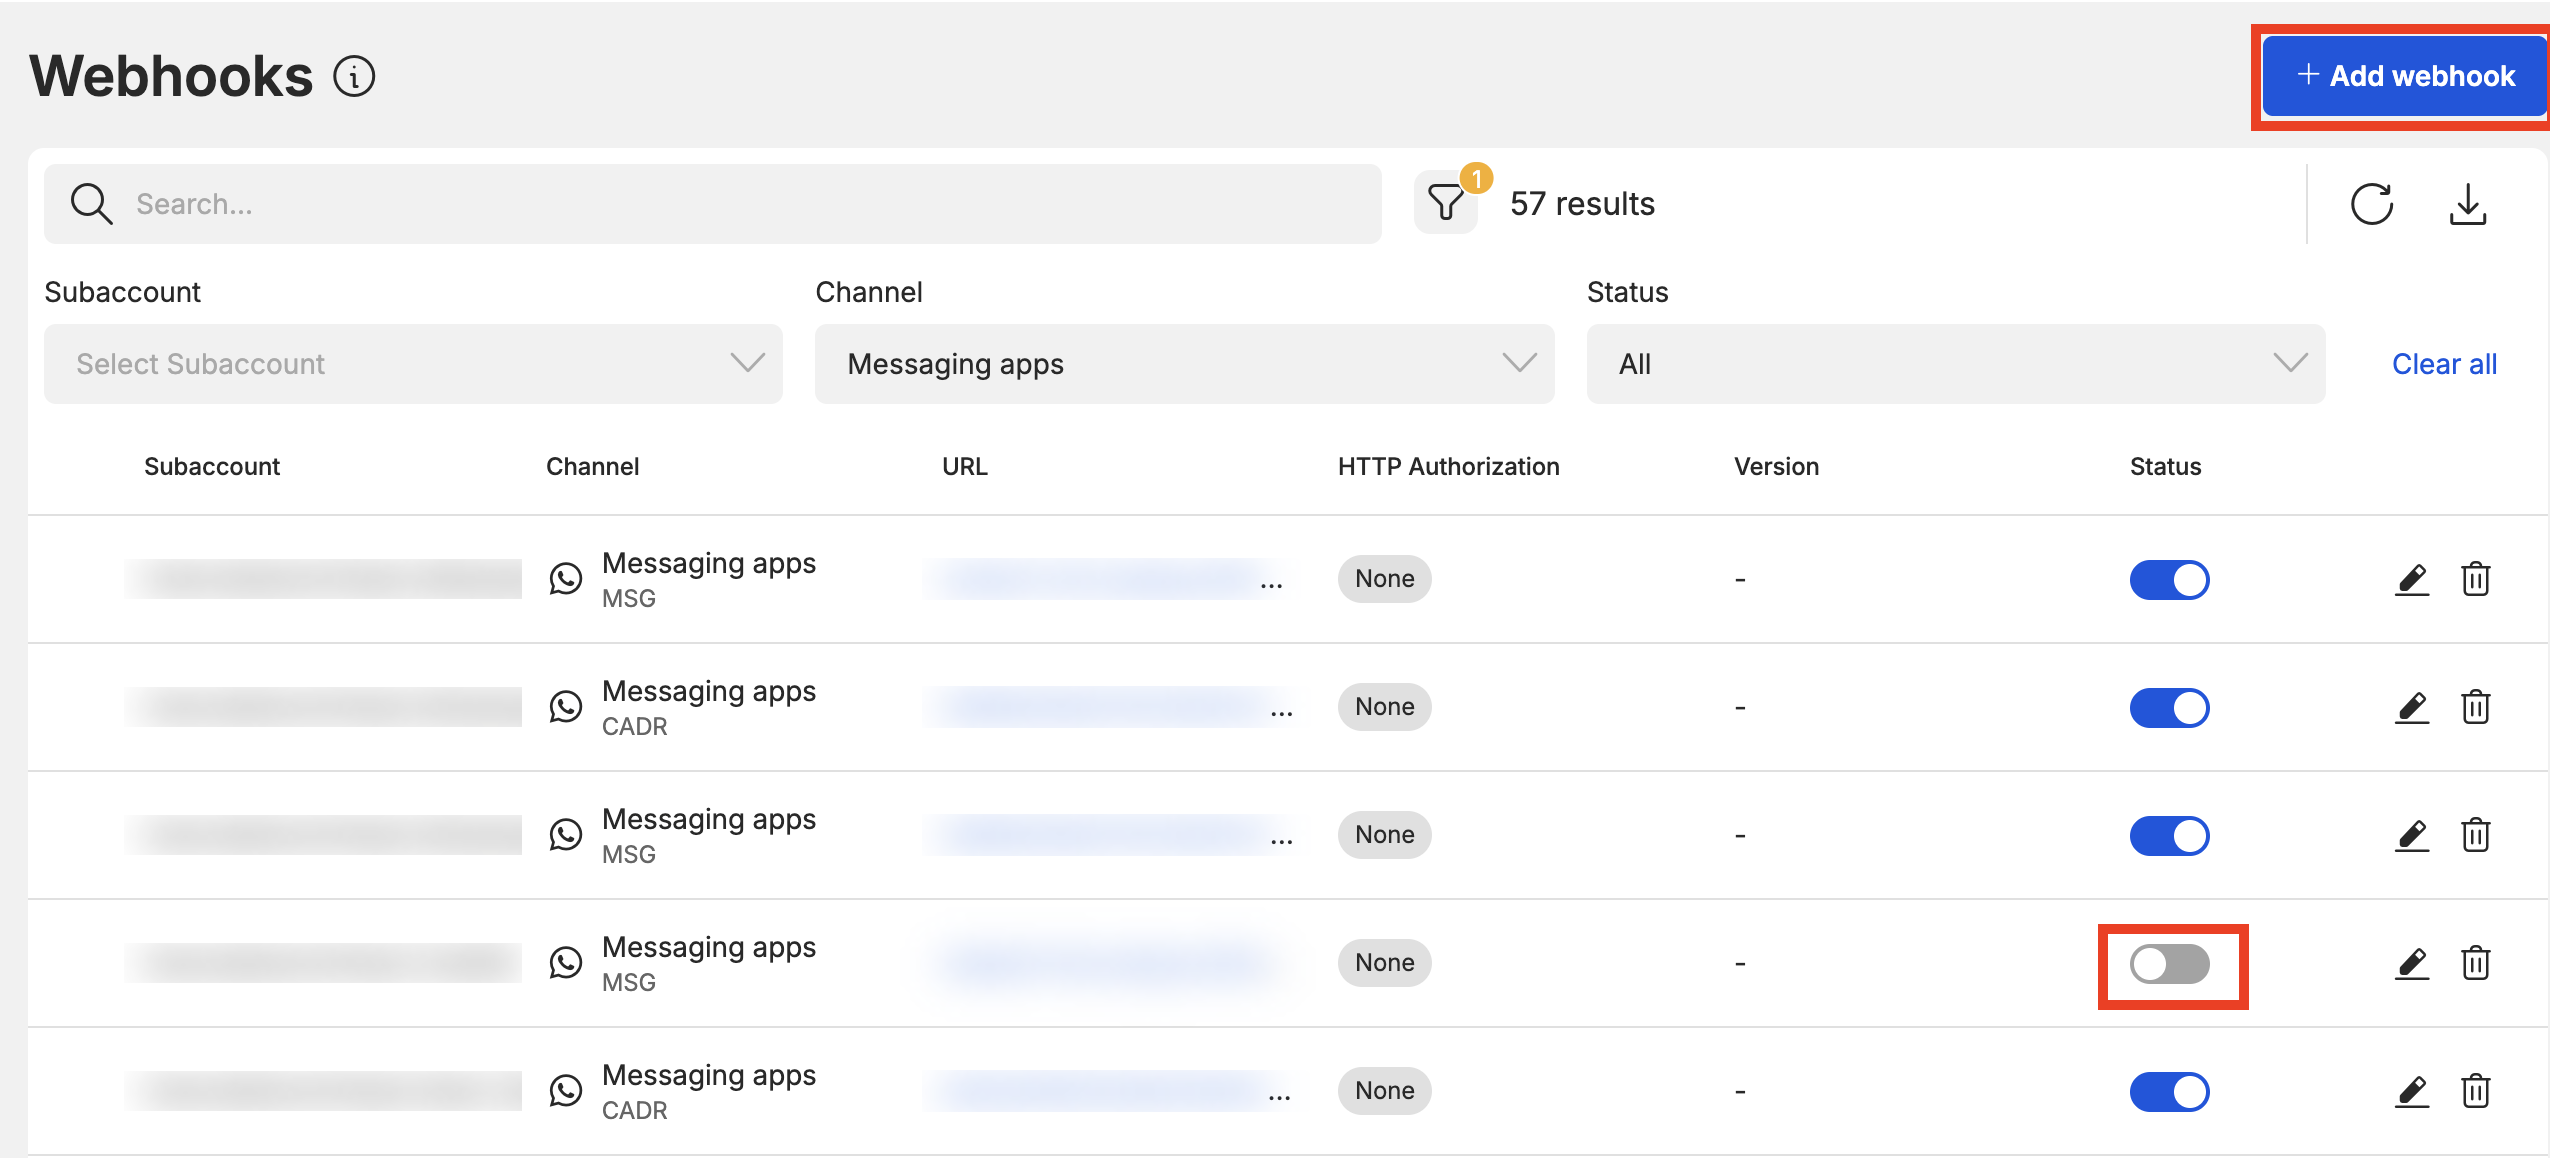 When you click on the Add webhook button, you will see this pop up.
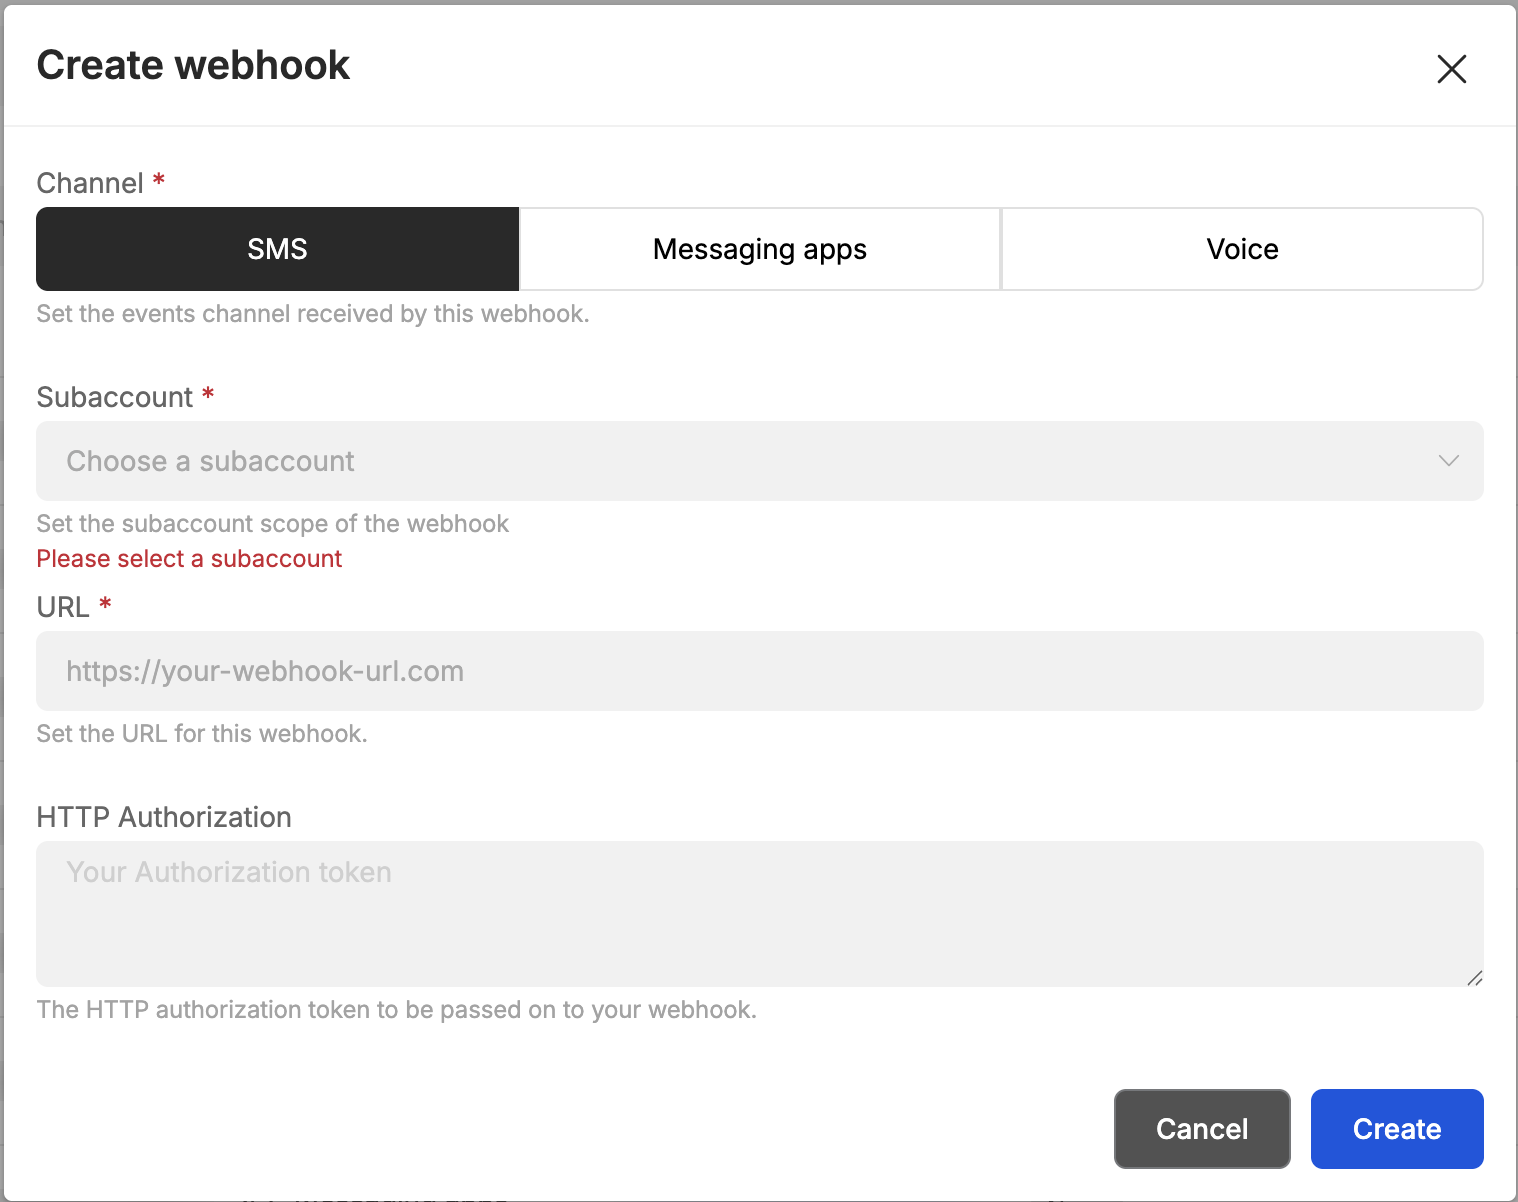
The popup above allows you to create new webhooks, it can be enabled for all sub-accounts or for a specific one only.
You can then select if you want to setup this webhook for SMS, Messaging Apps, or Voice. If you select SMS you will receive both incoming SMS and SMS delivery information on this webhook.
For Messaging Apps and Voice, you can customize your configuration for each type of webhook.
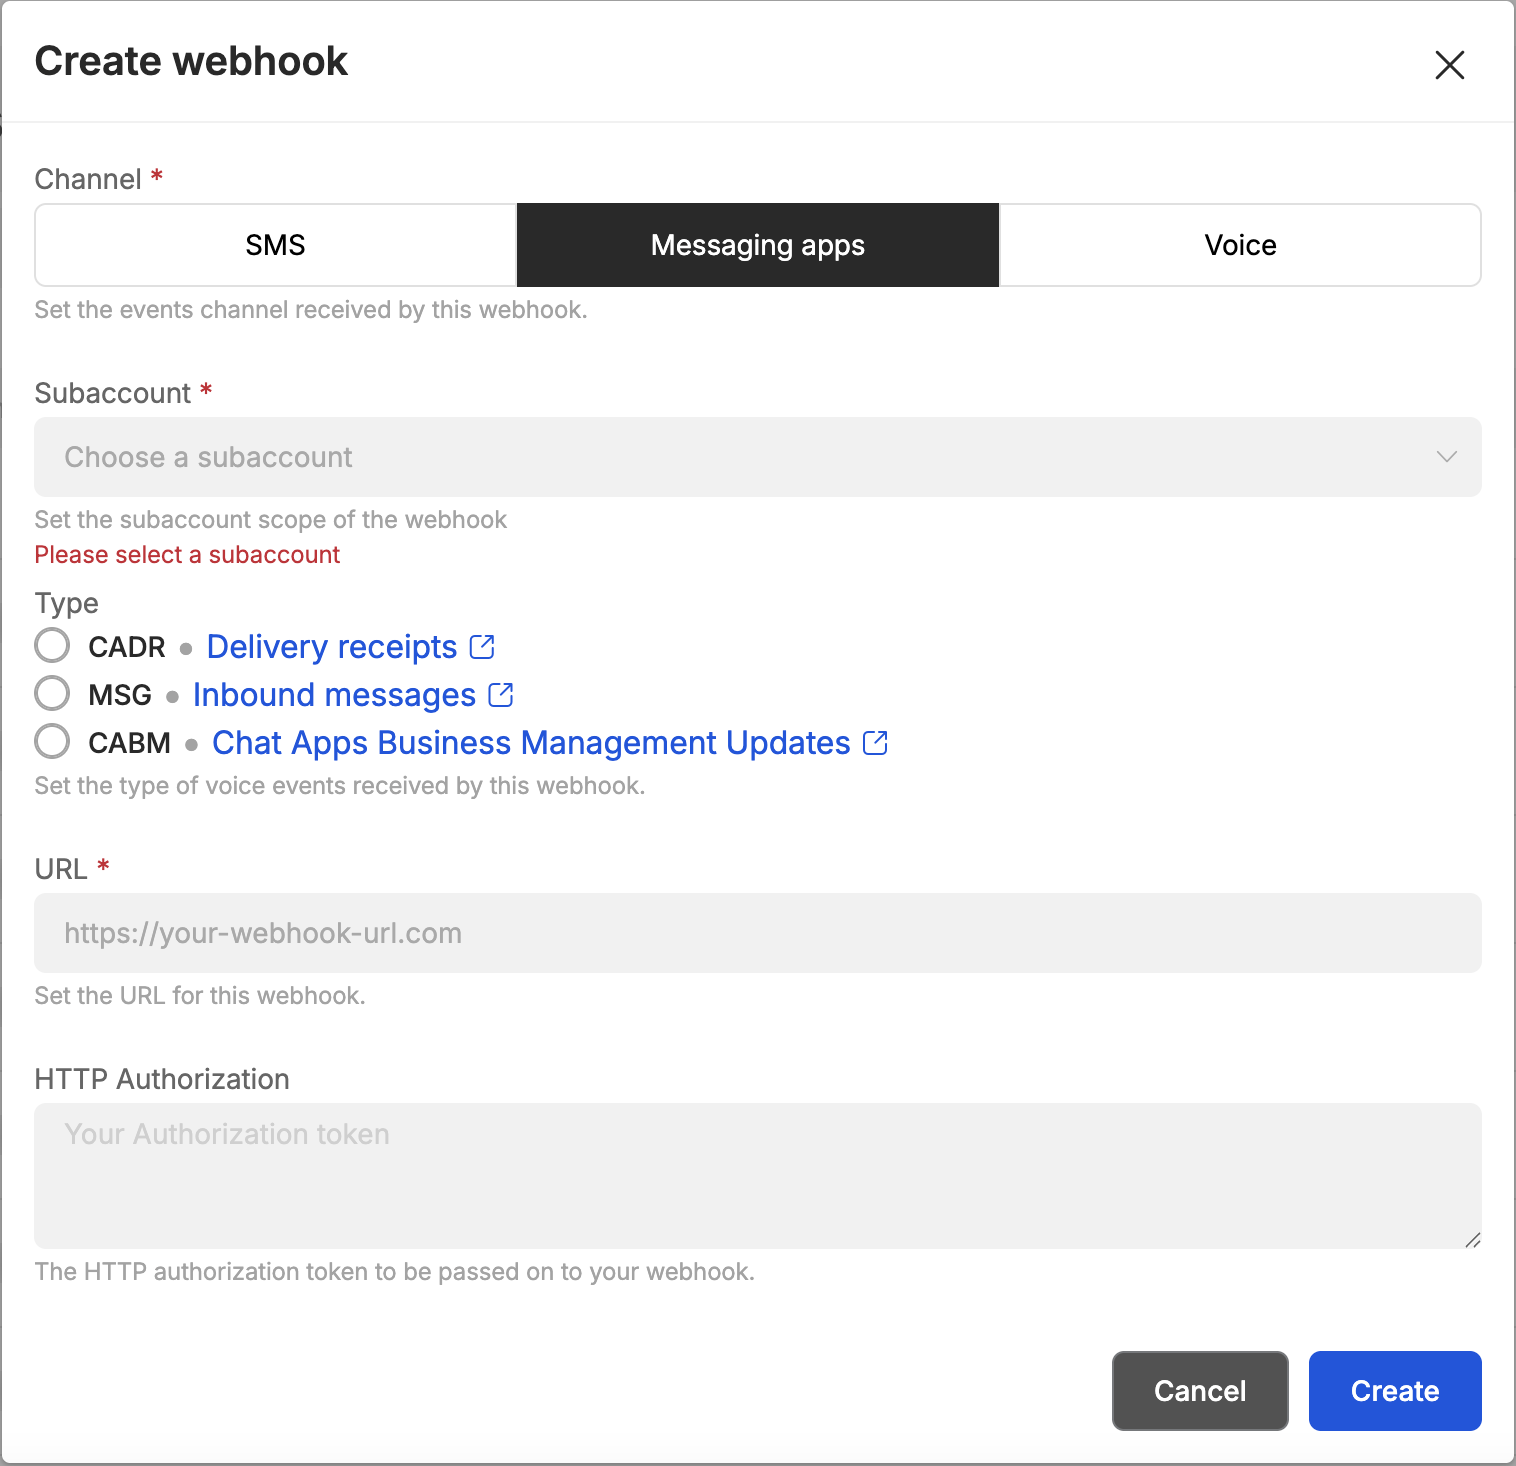
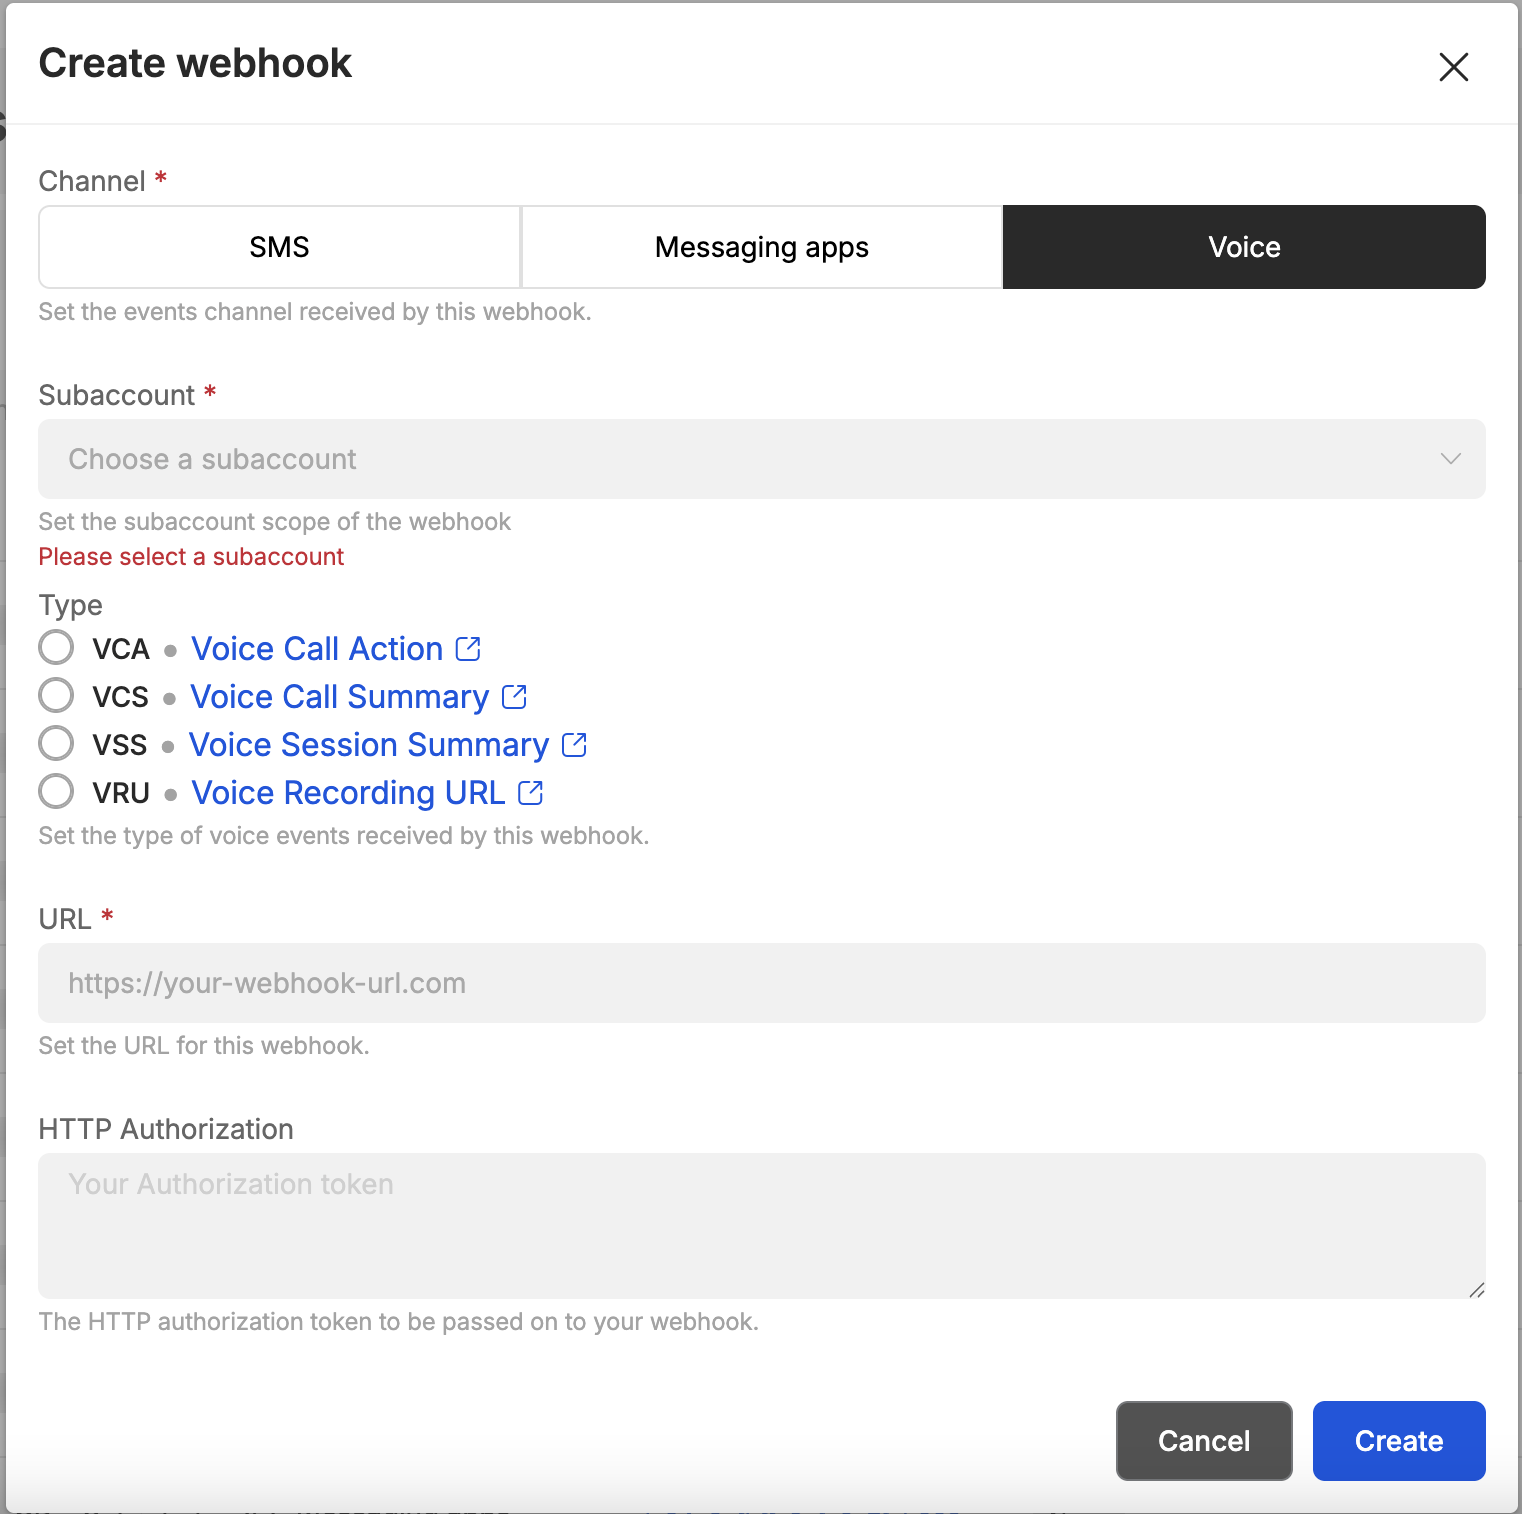 The HTTP Authorization field is an optional parameter, in case your webhook requires authentication.
Webhooks can also be managed via API, here for ChatApps and here for SMS, and here for Voice.
IP Whitelisting
With 8x8, your communication is secure, even in the unlikely event that someone gets hold of your API key. That's because only authorised devices from your approved locations (whitelisted IPs) can access our platform.
You can set this up using your 8x8 Connect portal here.
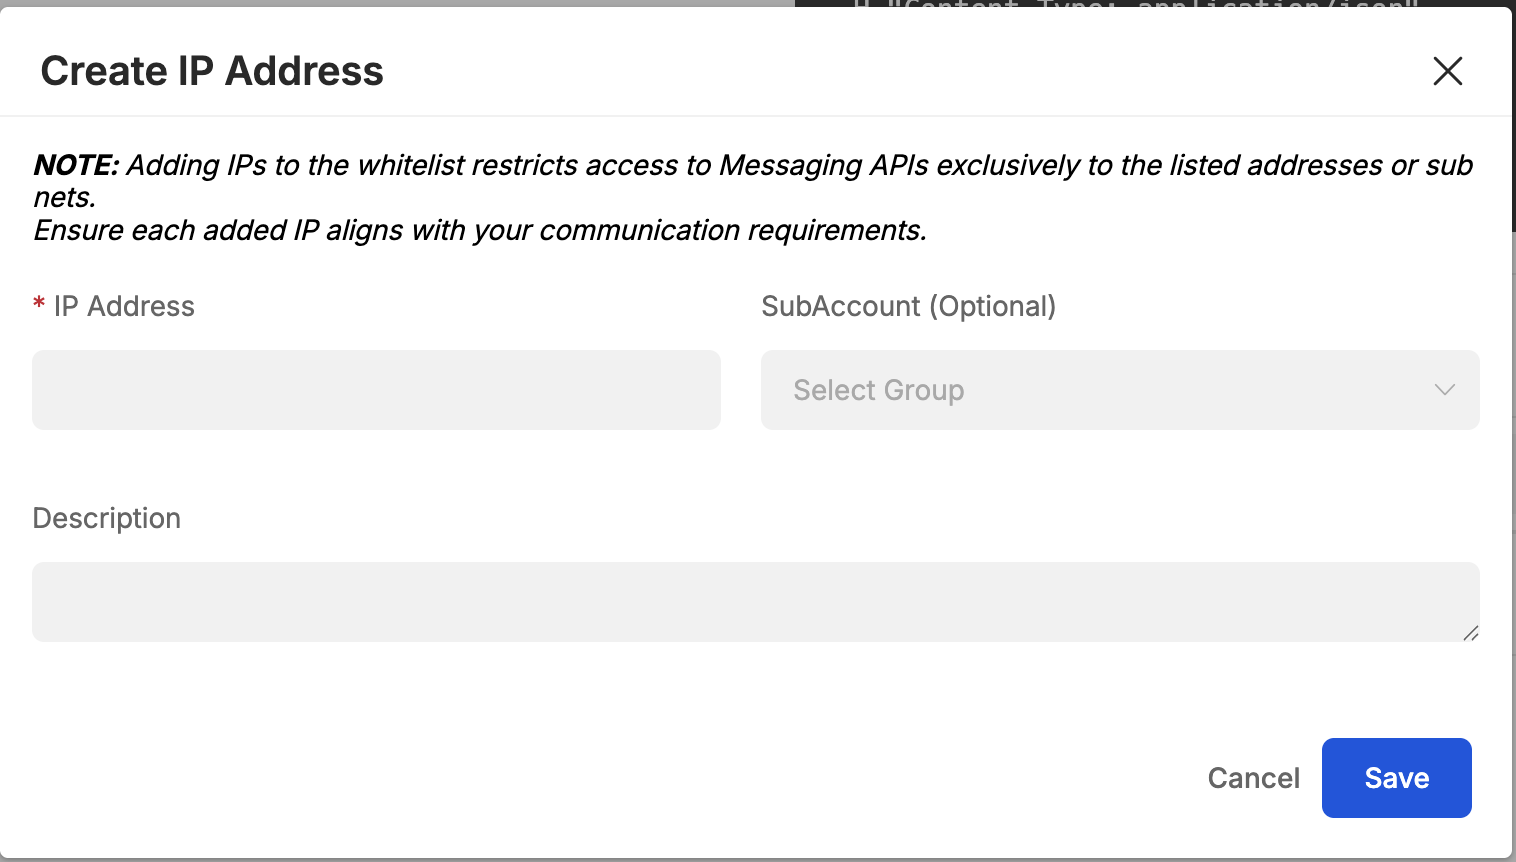
Under IP Whitelisting section. You may click the Create IP Address button.
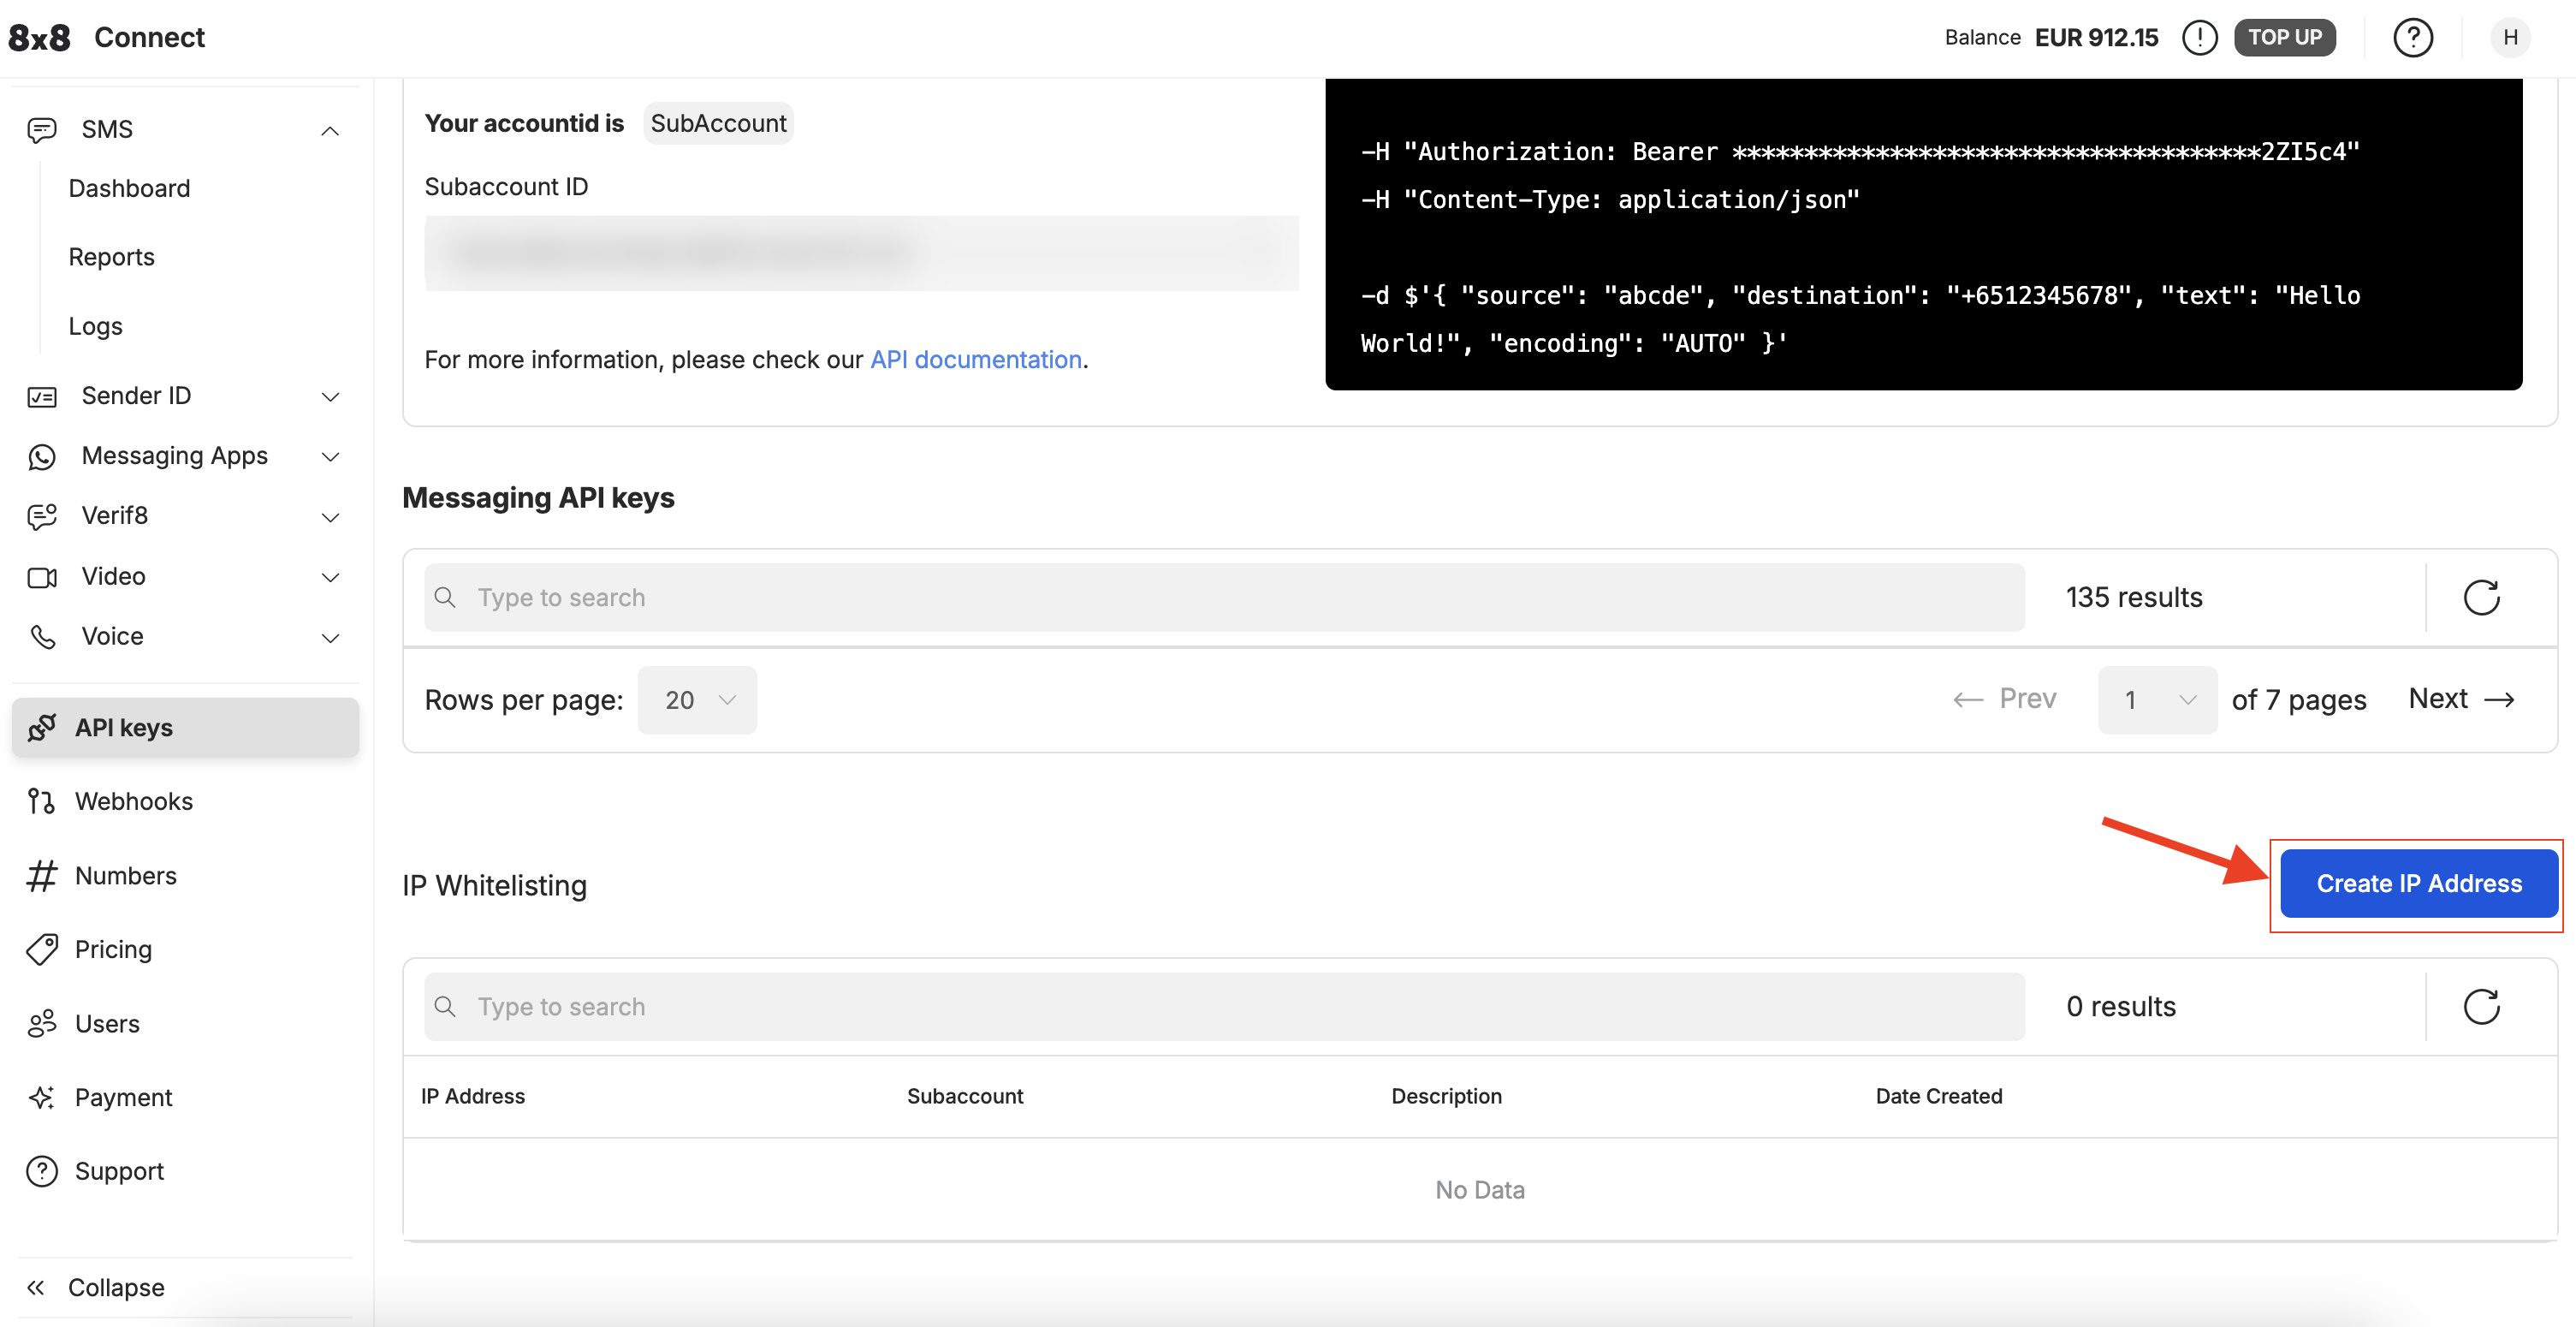 You will be prompted to input the IP Address and SubAccount. If you do not input a SubAccount, the IP Address will be whitelisted for all SubAccounts. Click SAVE once done.
