Sending SMS using Multi-Channel Sender (MCS)
Multi-channel Sender
 The Multi-Channel Sender (MCS) campaign creation feature in Connect
The Multi-Channel Sender (MCS), or just Sender, is a powerful campaign creation feature within Connect that lets you send various message types. You can use it to dispatch SMS, SMS Engage, WhatsApp, Viber, and Voice (text-to-speech) messages.
You'll find it conveniently located in the top left navigation menu, right after "Overview."
Video Guide
Below is a video guide that covers how to send an SMS message which serves to accompany the content presented on this documentation page.
Sending SMS
You can personalise, schedule and send up to a million SMS in one go.
Steps on sending SMS
(For this tutorial we will highlight the method for uploading a file since it is the most popular way to send SMS)
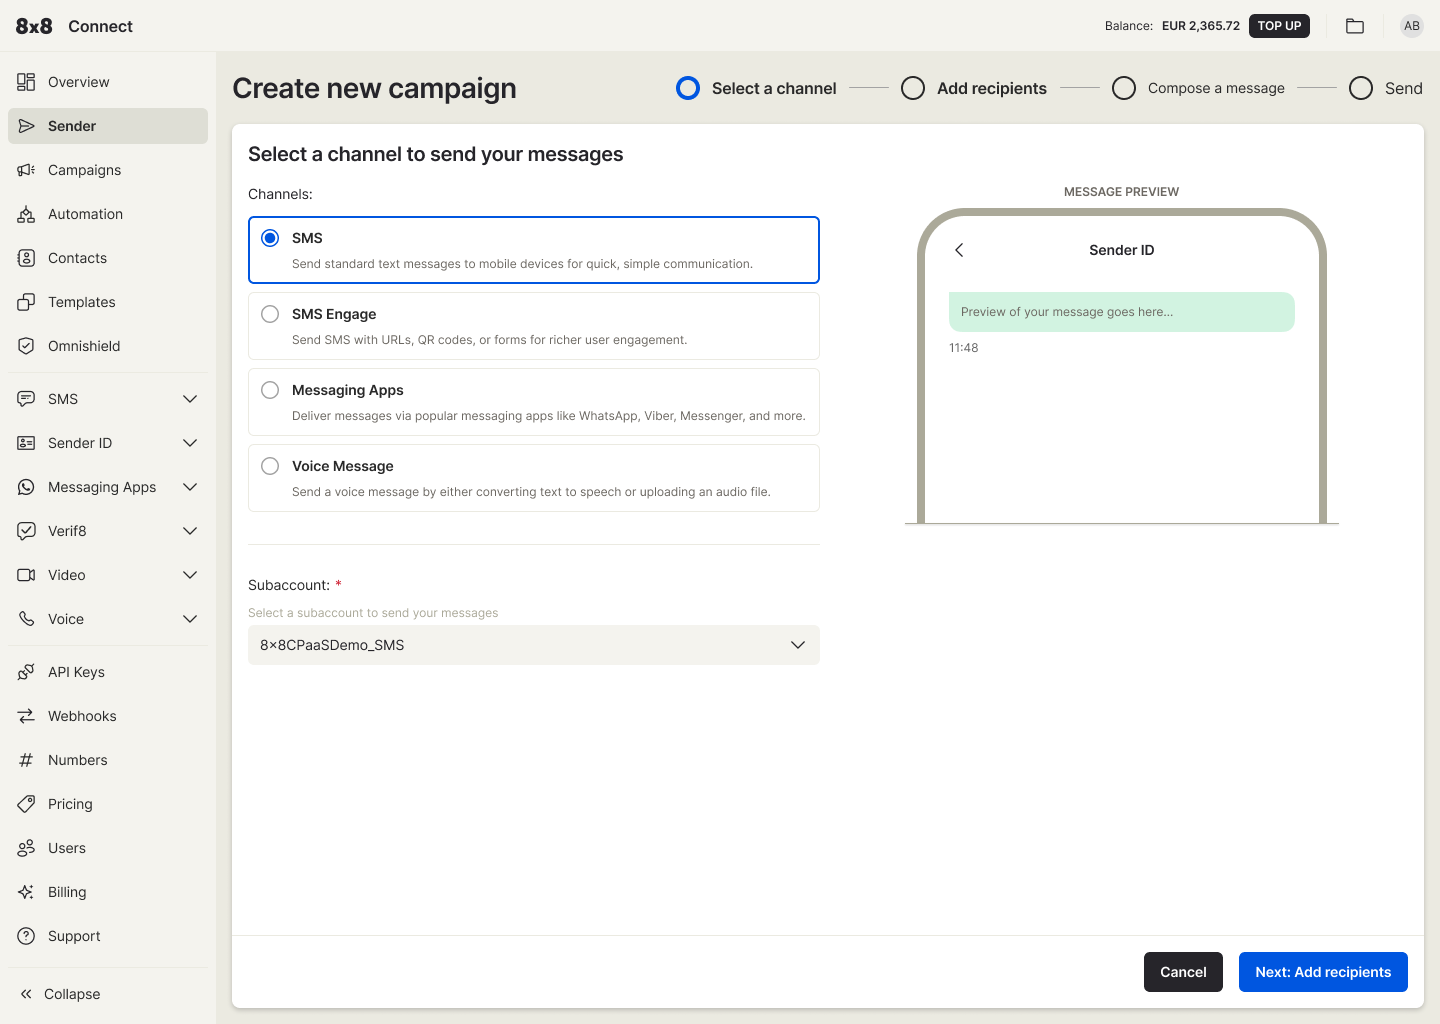
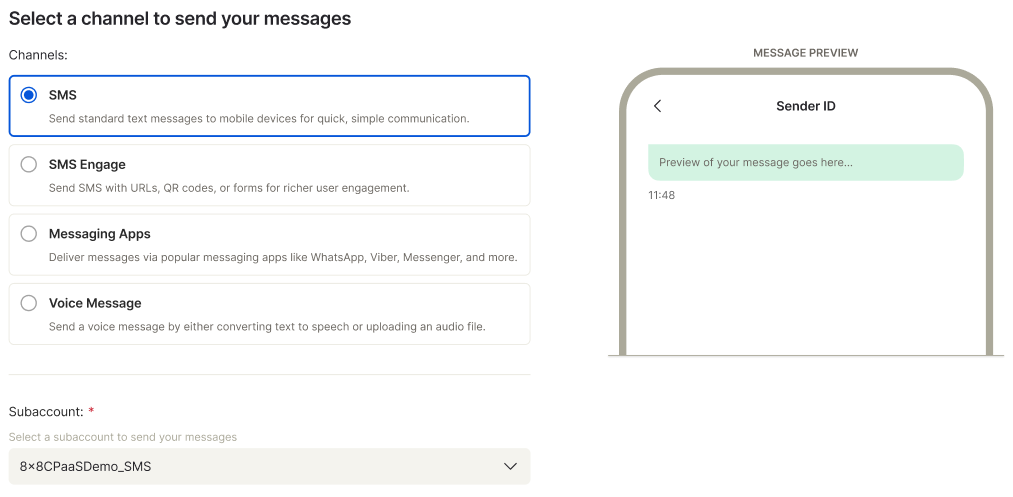
- Select "SMS" as your channel and select your subaccount.
(After you sign up, a sub-account is created and pre-selected for you. You may change this if you have different sub-accounts, which can be created by submitting a request to cpaas-support@8x8.com)
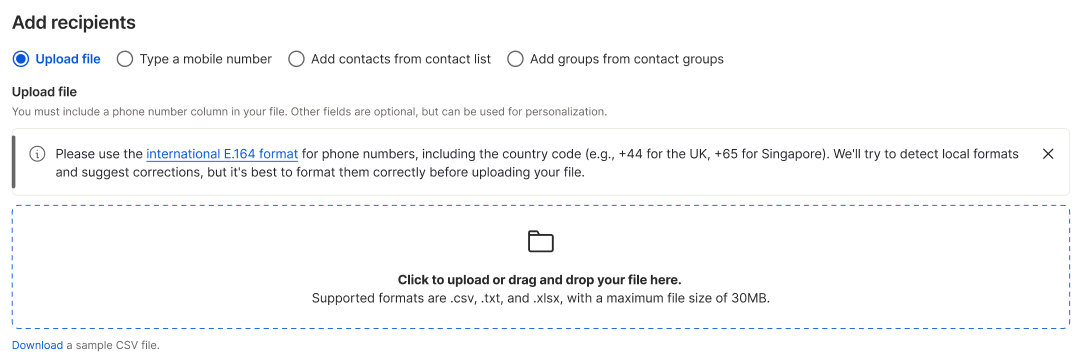
- Click "Add recipients and you will be redirected to Recipients page to enter your destination number(s).
There are four(4) ways you can do this.
a. Upload a file
b. Type a mobile number
c. Add contacts from your contact list
d. Add group from your contact groups
![]()
- You can upload your contact list by either clicking the "Drag & drop to upload" icon or simply dragging and dropping your file directly. For best results, we recommend using a .csv file formatted according to our default layout (you can find a sample file in this step for reference).
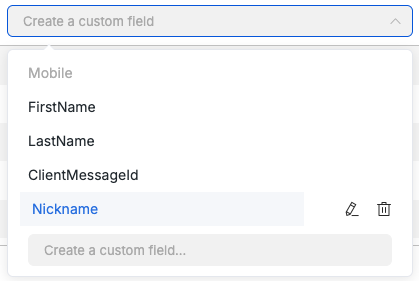
- Once you've uploaded your contacts, you can easily adjust the column labels to match your data.
You'll find standard options like Mobile, FirstName, LastName, and ClientmessageId ready for selection. Need something more specific? Just type in a custom field name and press Enter to create and then select it..
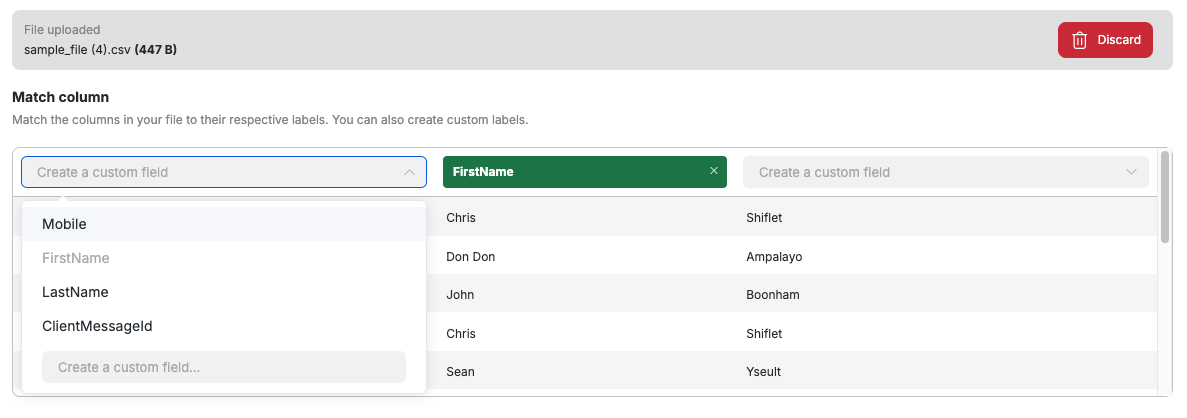 Creating a custom field (From the screenshot below, the user typed and entered a new field called
 Nickname)
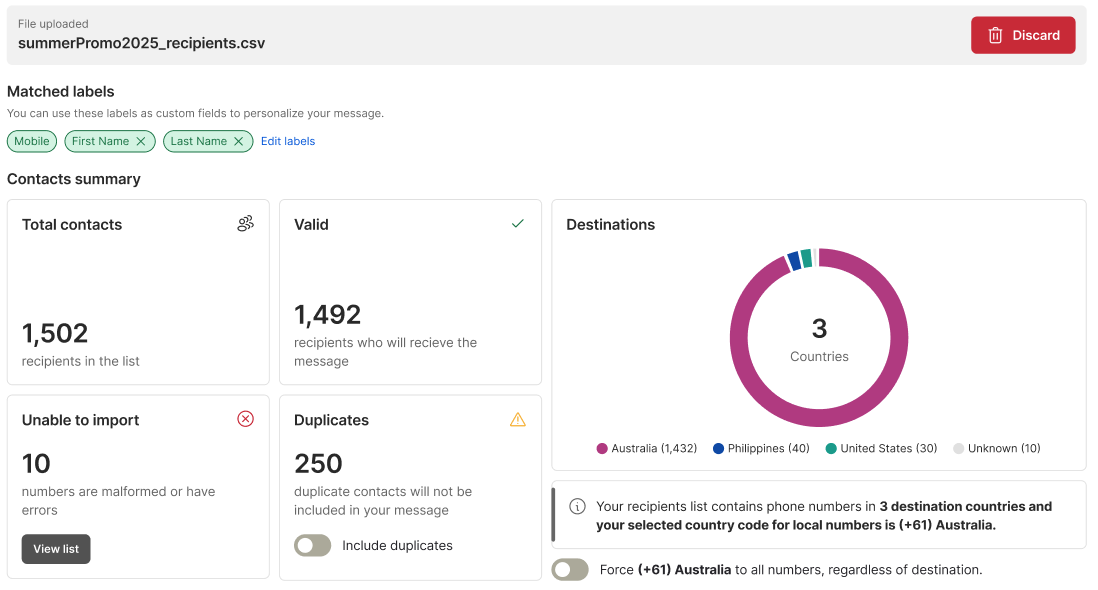
- Click "Process contacts" to review your contact list. On this screen, you can verify all the fields you've selected, check country destinations, and see the total valid numbers, as well as any duplicates. If you want specific contacts to receive the same message multiple times, you can choose to "include duplicates."
Handling Mixed Country Codes in Destination Lists
If your destination list has phone numbers with different country codes than your current selection for local numbers, a notification will pop up under the Destinations card. You'll get an option to force apply the selected country code to all numbers.
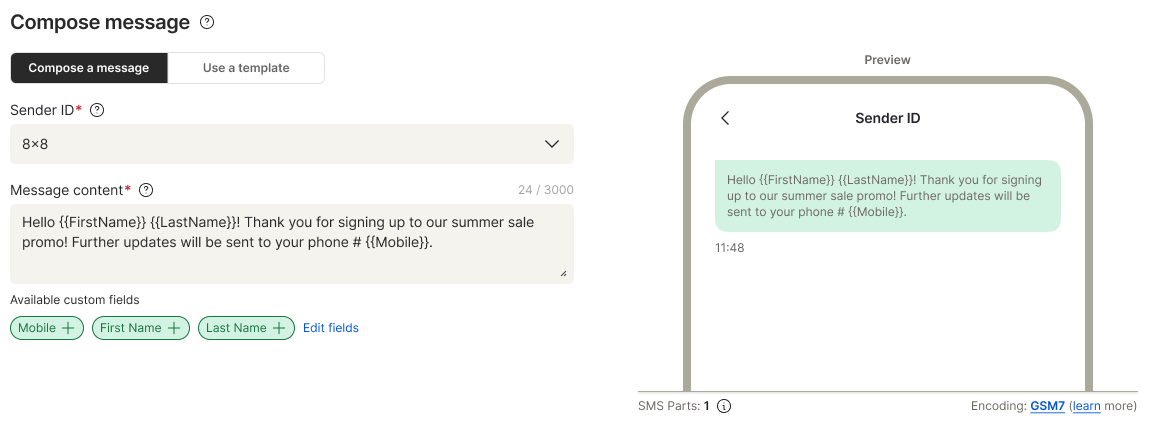
- Next, click "Compose a message" to start writing your message.
Before crafting your message, always enter your Sender ID. We'll automatically save it for you, so next time, just search and pick it from the dropdown list.

📘 Note:
Some countries don't support alphanumeric Sender IDs, and even when they do, pre-registration is often required. We also advise against using single-character spacing in your Sender ID, as this can negatively impact message delivery. The impact of single spacing can vary significantly between operators and countries.
For any assistance with your Sender IDs, please reach out to our support team.
Compose your message in the text area. To personalize it, simply click on a field from the "Insert custom field" list below.
 SMS Character Encoding Warning
Our system helps you manage message length and cost when composing SMS. You'll see a warning if your message contains non-GSM7 characters and uses 2 or more SMS parts, just to raise awareness of your increased campaign cost.
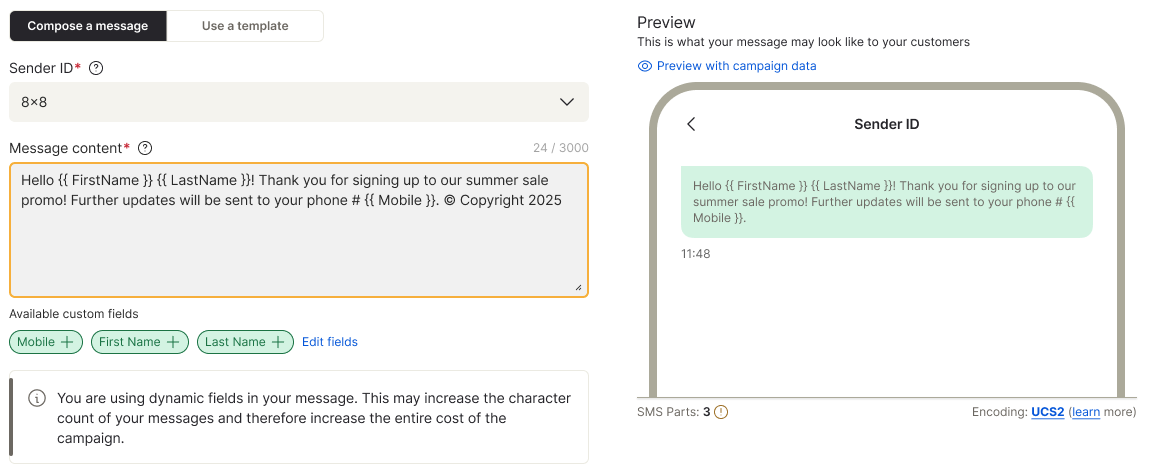
Warning Indicators
When these conditions are met, you'll see:
- A warning banner.
- The text area border turns yellow.
- A yellow warning icon appears next to the SMS Parts counter.
 What You Can Do
The warning banner won't stop you from proceeding; the "Next: Confirm and save" button remains active. You have three options:
- Close (X) button: Hides the banner. The yellow border and warning icon remain. This isn't saved, so the warning will reappear for future messages under the same conditions.
- Remove non-GSM7 characters: Cleans your message by removing non-GSM7 characters. The banner dismisses, the text area border resets, and the warning icon disappears. This isn't saved, so the warning will reappear for future messages under the same conditions.
- Do not show this warning again: Hides the banner, resets the text area, and removes the warning icon. This preference is saved in your cookies, so the warning won't appear again for future messages if you're creating messages on the same device.
You can also simply proceed to the next step without interacting with the banner at all.
- Once your message is ready, click "Send your message(s)". Every message you send, regardless of quantity, is treated as a campaign. A campaign name is generated for you by default, but you're welcome to change it.
You'll also need to decide when to send your message: "Send message now" is pre-selected for immediate delivery, or you can schedule it for a later time.
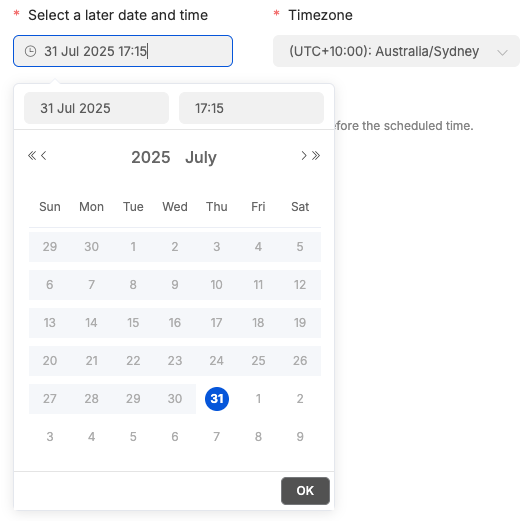
❗️ Scheduled messages
Keep in mind you can only cancel scheduled messages up to 3 minutes before their send time. Messages cannot be cancelled if this deadline is missed.
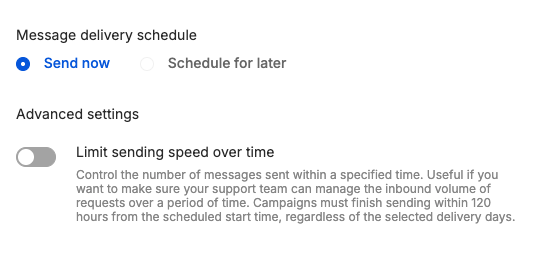
Advanced SMS campaign settings - Control send speed to match your capacity
This feature gives you greater control over your SMS campaigns by helping you manage the delivery speed of your messages. It's designed to prevent a sudden flood of customer responses that could overwhelm your support team. By using this throttling mechanism, you can ensure a steady and manageable flow of customer engagement.
To control the send rate, you must enable the Limit sending speed over time toggle in the "Confirm and save" page during SMS campaign creation for both "Send Now" or "Schedule for later" campaigns.
Once enabled, you can configure the following fields:
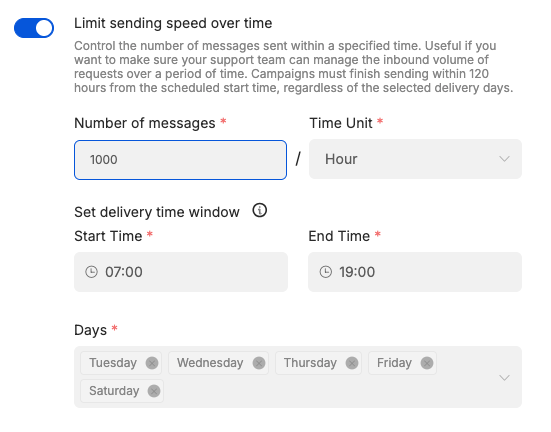
- Number of messages: Set the maximum number of messages to be sent within a specific time unit.
- Time Unit: Choose from a dropdown menu with options: Minute, Hour, or Day. This selection determines the rate at which messages are sent.
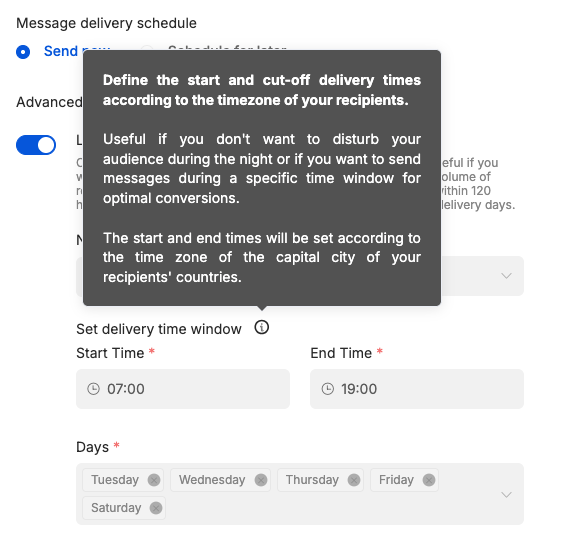
- Delivery Window: Set a Start Time and End Time to define the hours when messages will be sent. This is useful if you don’t want to disturb your audience during the night or if you want to send messages during a specific time window for optimal conversions. The start and end times will be set according to the time zone of the capital city of your recipients’ countries.
- Days: The system defaults to 5 days starting from the campaign creation or scheduled date. You can select or deselect days within this dynamic five-day window. The maximum duration for message throttling is a 120-hour (5-day) delivery window.
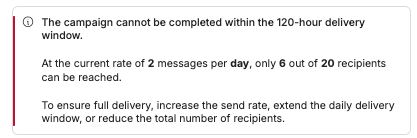
📘 Message sending limits
If your configured send rate won't reach all recipients within the 120-hour delivery window, a validation error will appear, and the "Submit" button will be disabled.
For example, if you set a rate of 2 messages per day for 3 days to a list of 10 recipients, only 6 messages will be sent, meaning your campaign will be incomplete. To fix this, you can increase the number of messages, change the time unit, extend the delivery window, or reduce the total number of recipients (e.g. split the campaign into multiple smaller ones)
- Click "Send" to process and send your message. If you need to re-enter all the fields, simply click "Cancel".
- After submitting, you'll be redirected to the list of Campaigns where you can see the last campaign created and its status right at the top of the list.
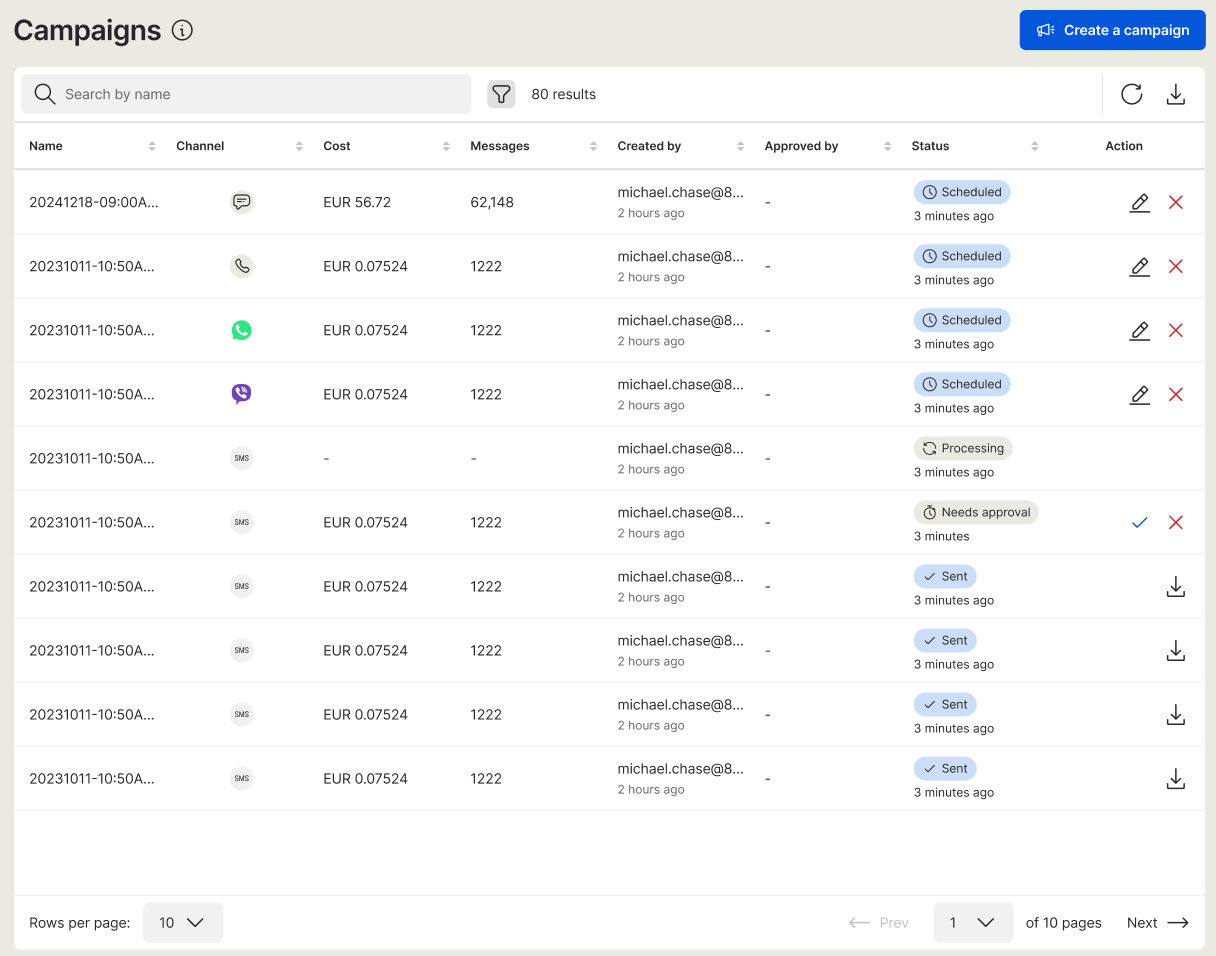
📘 Campaign status with controlled sending speed over time
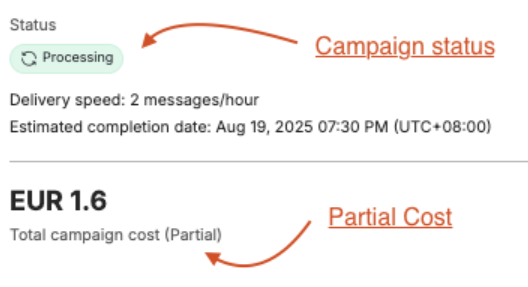
After you submit a campaign that has limited sending speed over time (see above feature), it's added to the Campaign list with a "Processing" status.
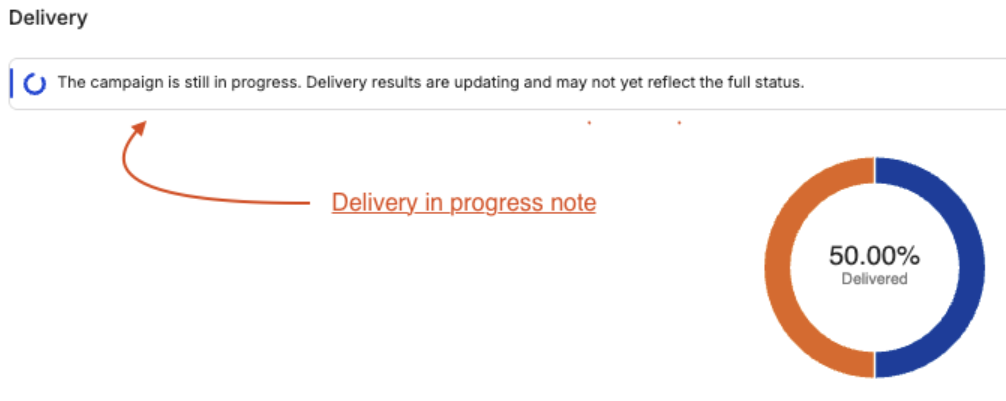
The campaign details page may show an empty state if messages haven't started sending yet. Once messages begin to send, a partial state will be displayed, including a "Delivery in progress" note and a "Partial" cost label showing the running cost.
Message Status Update Timing
All messages campaigns will have their status updated every 5 mins for their first day. After that, on the second and succeeding days, status will only be updated once a day at 18:00 UTC (2:00 AM Singapore Time).