Batch SMS
Tutorial: Learn how to use API for batch SMS
Introduction
8x8 offers different API methods that allow you to send SMS programmatically.
In this tutorial, we are going to cover the bulk SMS method: Send SMS batch.
You can also send a single SMS in one command - for more information, check the following methods in the documentation: Send SMS API
If you follow the different steps of this tutorial, you will get to send a batch of SMS directly from your command line utility using a simple curl command.
Index
- Learn how to use the method for sending batch SMS
- Prerequisites
- Account and credentials
- Signing-up
- Finding your apiKey bearer token (for API authentication)
- Identifying your 8x8 SubaccountId
- API request
- Preparing the URL
- Preparing the authentication
- Preparing the data payload
- Putting it together and posting the curl request
- Going further
- API response
- API errors
In this tutorial, we are going to send a (small) batch of SMS at once by contacting two recipients in one API request using curl.
For this, we are going to use an 8x8 account created with our email: user@example.com.
We are going to use our subaccountid riders_hq.
The apiKey for our account is 5DhZxZRILVPKjXuFWsd7QGZ**********31n19pYmg.
Prerequisites
- Command line interface compatible with CURL
- 8x8 CPaaS account
- apiKey (Bearer token)
- 8x8 CPaaS subaccountid
- Destination phone number
- SMS Body
Account and credentials
You will need to sign-up to use the API. The following steps will guide you through this process and highlight the information to keep aside.
I. Signing-up
- Head to 8x8 Connect sign-up page
- Enter your email and follow the instructions to define your password and finalize your account (by default, API password and account password are the same, you can modify this from your account settings)
- Confirm your email address by clicking on the validation link you received in the activation email to activate your account.

II. Finding your apiKey bearer token (for API authentication)
- Head to https://connect.8x8.com .
- Click on LOG IN.
- Enter your email address and password to get access to your account dashboard.
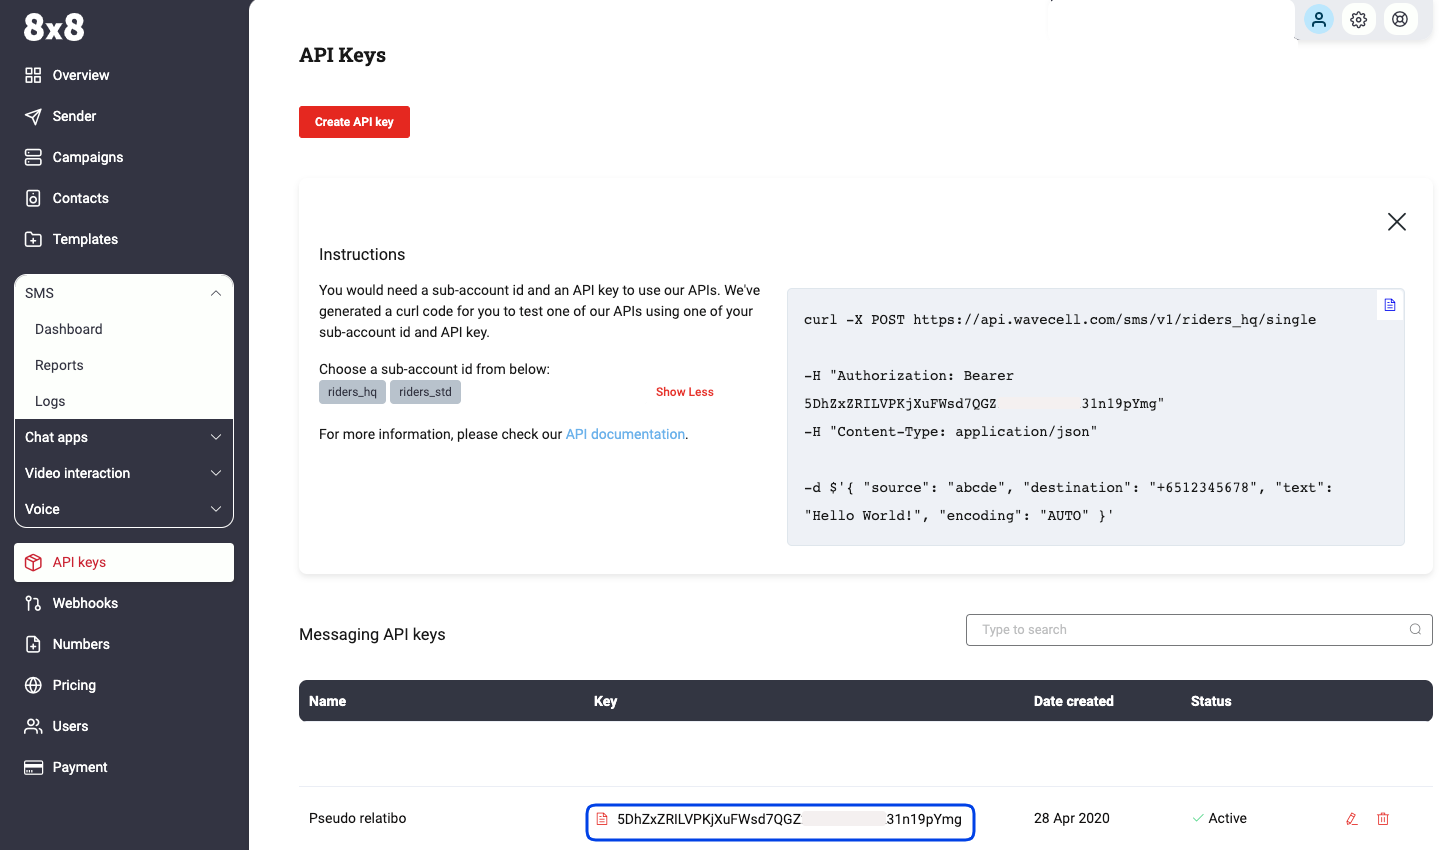
- Head over to the side menu > API keys section
- Create an API key if empty and then keep the API Key value, here:
5DhZxZRILVPKjXuFWsd7QGZ**********31n19pYmg

III. Identifying your Subaccountid
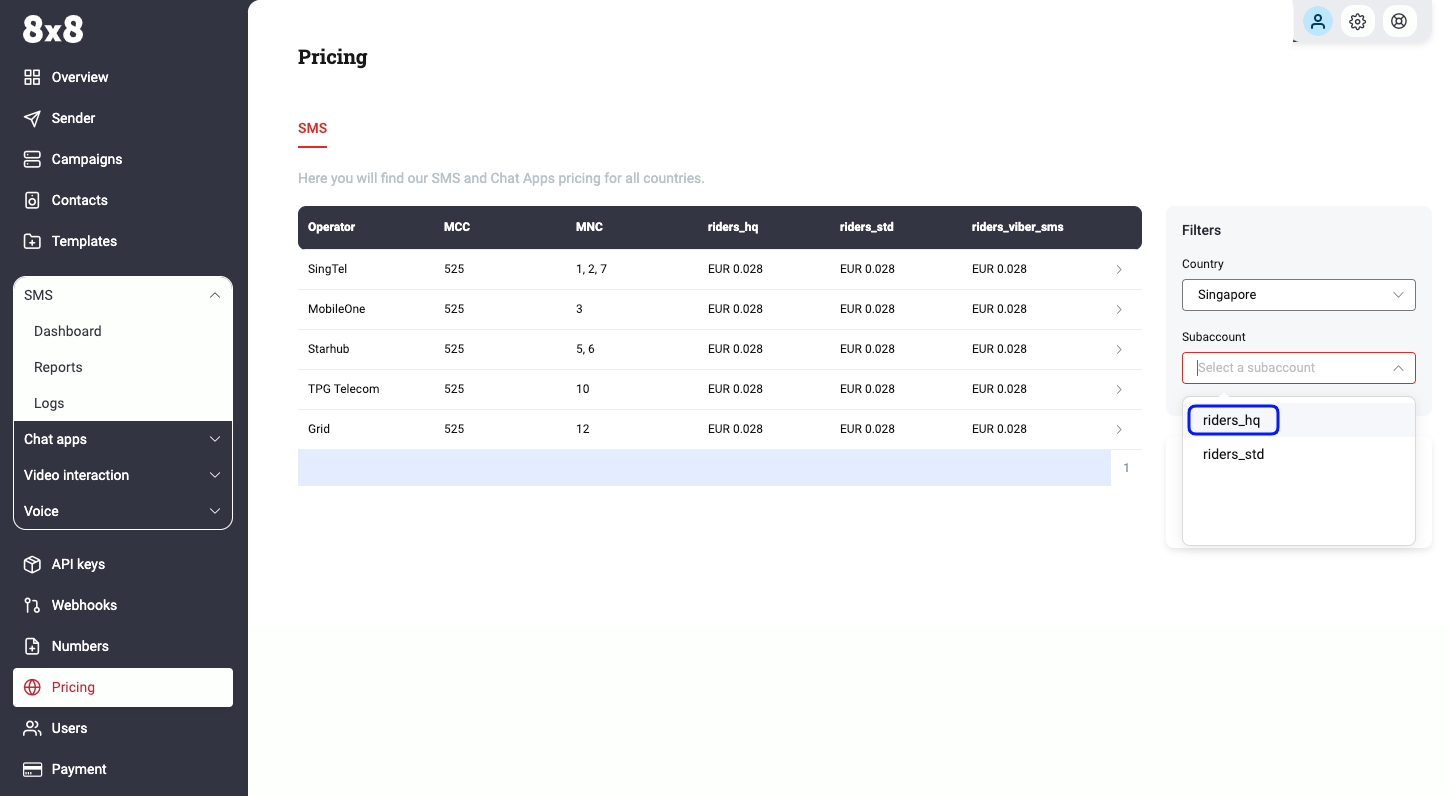
- Head over to the pricing section and use the subaccountid list to retrieve the
subaccountidthat you want to use - By default, your account comes with only one
subaccountidfor your high-quality service. It is designated by youraccountidand the suffix_hq. - Note down this value, you will need it later.
- In that example, the
subaccountidisriders_hq

API Request
The 8x8 SMS batch method expects requests sent by developers to respect a specific format.
In the following parts, we are going to go over the different elements of the request:
- the URL format
- the authentication
- the data payload.
At the end of the section, we will generate a curl command to send an SMS directly from the command line.
I. Preparing the request URL
Remarks
- We are going to send a POST request to the 8x8 API batch URL endpoint.
- As detailed in the Send SMS batch, the URL is defined by the following pattern:
https://sms.8x8.com/api/v1/subaccounts/{subAccountId}/messages/batch
Tutorial URL
- In order to create the URL to use, we are going to replace
{subaccountid}in the pattern above byriders_hq, the subaccountid that we are using in this tutorial - In that example, the URL that we are going to send the request to is:
https://sms.8x8.com/api/v1/subaccounts/riders_hq/messages/batch
Data Center Region
- To ensure the use of the correct data center region, it is necessary to modify the base URL to correspond with the provisioned region of your account. Refer to the table below for the appropriate base URL associated with each data center region:
| URL | Region |
|---|---|
| https://sms.8x8.com | Asia Pacific (default) |
| https://sms.us.8x8.com | North America |
| https://sms.8x8.uk | Europe |
| https://sms.8x8.id | Indonesia |
- For more information on data center regions, please visit the following page.
curl
- In curl, we will have to indicate that we want to do a POST request to this URL by using the following command:
curl -X "POST" https://sms.8x8.com/api/v1/subaccounts/riders_hq/messages/batch
II. Preparing the request authentication
Remarks
- As explained in the Authentication, the API authentication uses an apiKey bearer token method.
Tutorial authentication
- In this tutorial, the apiKey for our account is
5DhZxZRILVPKjXuFWsd7QGZ**********31n19pYmg.
curl
- In a curl request, bearer tokens must be passed as a header like so:
-H "Authorization: Bearer {token}" - We just have to replace our
{token}placeholder by our apiKey - The authorization header will then look like that:
-H "Authorization: Bearer 5DhZxZRILVPKjXuFWsd7QGZ**********31n19pYmg"
III. Preparing the request data payload
- The API expects to receive a structured request containing the SMS data in a specific format.
- As detailed in the documentation, the data that we have to submit should be a JSON object structured as follow:

Tutorial request data payload
-
The API expects to receive a structured request containing the SMS details and parameters. The format of the request is JSON and it can accept both optional and required parameters.
-
For simplicity sake, we are going to use only the most important of the parameters (the others are detailed in the documentation):
- Messages:
- Array containing multiple SmsRequest objects (see Single doc)
- Here we're going to send one template message and one non-template message
- For the template message, only the destination is mandatory, the source and text can be found below in the Template object
- For the non-template message, we specify the text
"Bob, special present for you from Santa"which differs from the text in the Template - Template:
- Object applying common properties to the SmsRequest objects in messages
- For a generic greeting, let’s use the value:
"Happy New Year!" - Encoding:
- This parameter tells the destination handset which encoding to use to display the SMS. Our text only contains GSM7bit characters which is the most standard encoding but for the sake of safety let’s use
"AUTO"- it means that the API will automatically detect the characters used in the text and select the best encoding.
- It prevents the message from showing up as “ ⃞ ⃞ ⃞ ⃞, ⃞ ⃞ ⃞ ⃞” in the case where we would have used special characters or another alphabet.Our final JSON object that we are going to send as the request data payload is then:
- Messages:
{
  "messages": [
    {
      "destination": "+6500000000",
    },
    {
      "destination": "+6500000001",
      "text": "Bob, special present for you from Santa"
    }
  ],
  "template": {
    "source": "MyBrand",
    "text": "Happy New Year!",
    "encoding": "AUTO"
  }
}
curl
- In curl, we will transmit the JSON data inline and indicate that the data payload is in JSON format using the following commands:
-H "Content-Type: application/json"
-d $'{
  "messages": [
    {
      "destination": "+6500000000",
    },
    {
      "destination": "+6500000001",
      "text": "Bob, a special present for you from Santa"
    }
  ],
  "template": {
    "source": "MyBrand",
    "text": "Happy New Year!",
    "encoding": "AUTO"
  }
}'
IV. Putting it together and posting the curl request
- If we wrap up all the elements prepared in the steps above, we should put together the 3 elements of our request: URL + Authentication + Data Payload
- To send the API request to 8x8 API batch endpoint with our message we should use the following command in our command line utility:
curl -X "POST" https://sms.8x8.com/api/v1/subaccounts/amazing_hq/messages/batch
-H "Authorization: Bearer 5DhZxZRILVPKjXuFWsd7QGZ**********31n19pYmg"
-H "Content-Type:application/json"
-d $'{
     "messages": [{"destination": "+6500000000"}, {"destination": "+6500000001","text": "Bob, special present for you from Santa"}], "template": { "source": "MyBrand", "text": "Happy New Year!","encoding": "AUTO" } }'
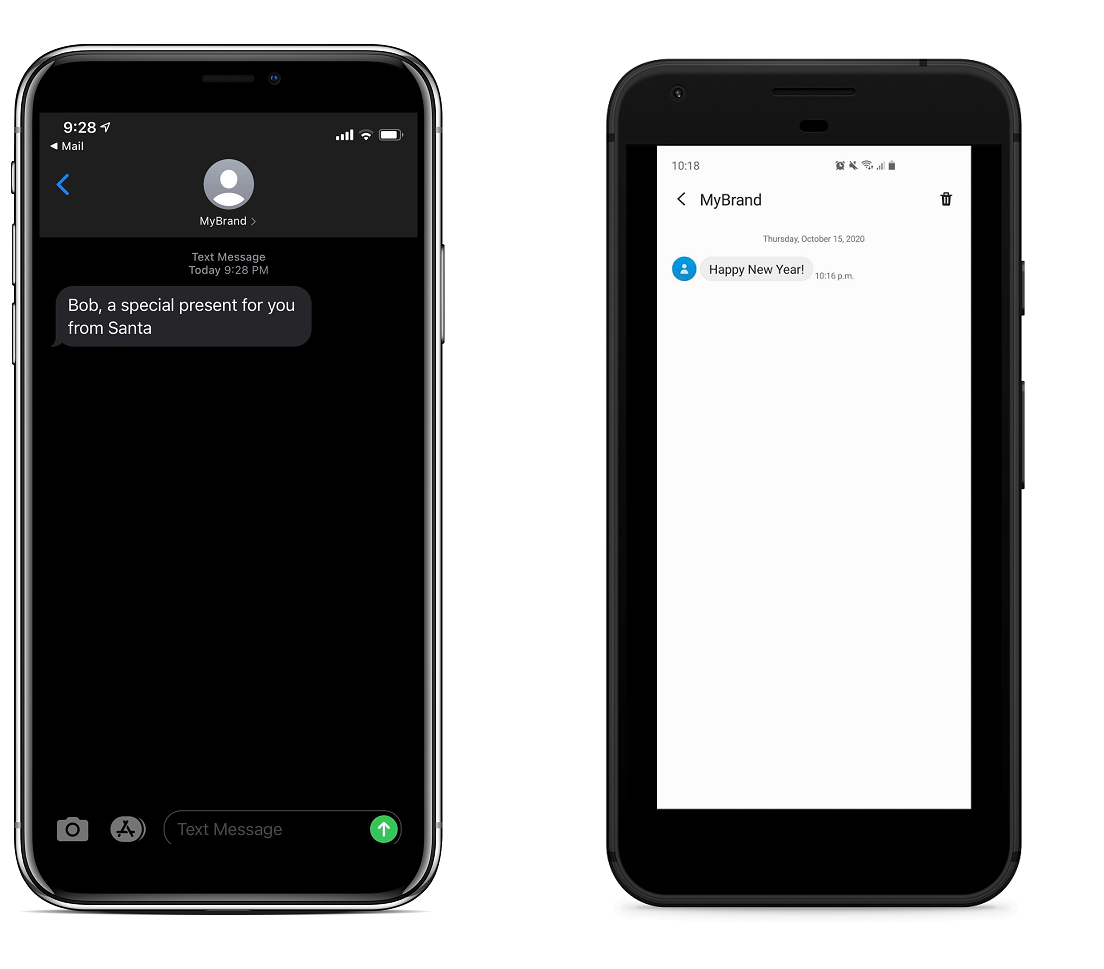
- And that’s it! Here is the result:

Going further
I. API response
- When sending the curl command above from your command line utility, you notice that the 8x8 API sends back a response that shows up in your terminal, for example in this tutorial:
{
  "batchId":"1328cb94-e714-eb11-8278-00155d9f27ac",
  "clientBatchId":null,
  "acceptedCount":2,
  "rejectedCount":0,
  "messages":null
}
- The API response is used to provide feedback about the expected result of the API request (sending an SMS) and various additional information.
- If we take some time to analyze the different elements there, we can identify the following:
- umid: it stands for unique message id, it is the unique id associated with this SMS by 8x8 CPaaS platform.
- clientmessageid: here, it is null because no value has been specified in the request but you have the possibility to attribute your own custom ids to your messages.
- destination: this is the phone number to which the SMS was sent.
- status: this array contains 2 elements: the status of the message and the description of this status
- For more information, check the dedicated section of the Send SMS batch, "Responses" section
II. API errors
- A developer World without error would not be funny!
- If ever you send malformed requests to the API, it will let you know by using some specific error codes in the response.
- You can find the different codes and their meanings in the API Error codes